
How do you set up a low-tech planted shrimp tank?
 PULSEKNOWLEDGE LIBRARY
A low-tech planted shrimp tank runs on hardy plants, a sponge filter, moderate LED light on a 6–8 hour timer, and no CO2 injection. Set up a 10–20 gallon tank, cycle it fully for four to six weeks until ammonia and nitrite read zero, then add 10–15 Neocaridina shrimp at stable parameters.
The outcome you should expect
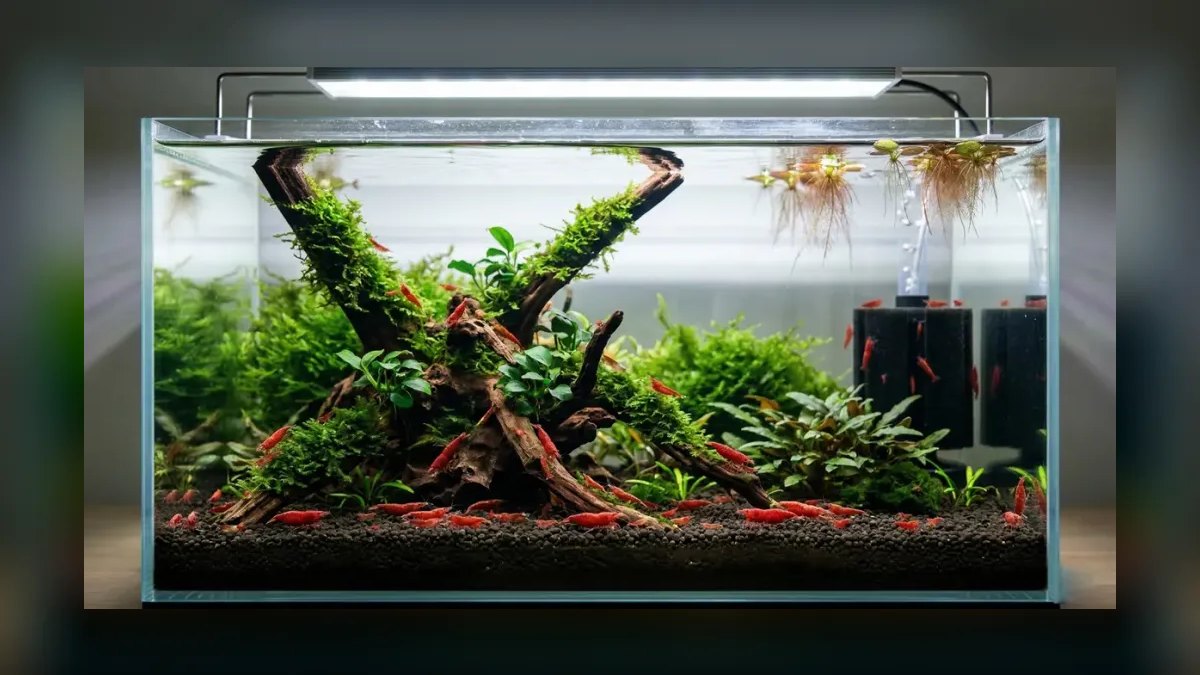
The finished system is deliberately boring, and that is the point. A properly established low-tech planted shrimp tank should reach a state where you touch it for about fifteen minutes a week and it holds steady between visits. Concretely, three to four months after setup you should see a colony that has grown from a starting group of 10–15 shrimp to somewhere between 40 and 80 individuals, a substrate carpeted in a thin brown-green film of biofilm that the shrimp graze constantly, and water test results that read 0 ppm ammonia, 0 ppm nitrite, and nitrate somewhere under 20 ppm without you doing anything heroic.
The plants will not explode with growth the way a pressurized-CO2 aquascape does. Java fern puts out perhaps two to four new leaves a month. Anubias may push a single leaf in that same window. Java moss and hornwort grow faster — hornwort can add an inch or more a week in decent light — and those fast growers are doing most of the nutrient export work. That slow pace is a feature: slow plants mean slow nutrient swings, and slow nutrient swings mean shrimp molt on schedule instead of dying stuck half-out of an old shell.
Expect a visible daily rhythm. Shrimp are most active in the hour after lights-on and again in the hour before lights-out, picking at leaf surfaces, hardscape, and the substrate. Berried females — carrying eggs under the swimmerets — should appear within four to eight weeks of adding a mixed-sex group. Eggs hatch in roughly 25–35 days depending on temperature, and Neocaridina hatch as fully-formed miniature shrimp, not larvae. That single biological fact is why this species works in a low-tech tank while Amano shrimp do not: Amano larvae require brackish water to survive, so an Amano colony never self-sustains in fresh water no matter how good your setup is.
You should also expect losses. Even a well-run tank loses one or two shrimp in the first two weeks post-introduction — transport stress and acclimation shock catch the weakest animals regardless of technique. A loss rate above 20% in that window means something is genuinely wrong; a loss of one or two out of fifteen is normal attrition. After the first month, deaths should become rare enough that finding a body is an event worth investigating rather than a routine occurrence.
What you should not expect is a pristine, algae-free showpiece. A low-tech tank runs with a permanent low-grade algae presence — green dusting on the glass, a bit of brown diatom film in the first two months, occasional green spot algae on the oldest Anubias leaves. This is the tank working correctly. The shrimp eat a meaningful share of it, and the rest you wipe off the front pane during water changes. Chasing zero algae in a low-tech tank usually means dosing something that kills the shrimp.
What drives that outcome
Four variables do nearly all the work: biological filtration capacity, light duration, water hardness stability, and copper exposure. Everything else is decoration.
Biological filtration is the foundation. A sponge filter driven by an air pump provides an enormous surface area of porous material colonized by nitrifying bacteria — the ammonia-oxidizers and nitrite-oxidizers that convert shrimp and plant waste into relatively harmless nitrate. The sponge does something a hang-on-back filter cannot: it is completely safe for shrimplets, which are roughly 2mm at hatch and get pulled into intake slots on powered filters. It also runs at a gentle flow rate that does not blast a 2mm animal across the tank. In a 10-gallon tank, a single medium sponge filter rated for 10–20 gallons, running off a small air pump, is genuinely sufficient. Two sponges in a 20-gallon is a reasonable upgrade.
Light duration controls the plant-versus-algae balance. Both plants and algae want light and nutrients. Plants win when they have enough light to grow steadily and enough nutrients from fish and shrimp waste to use that light, but not so much light that the excess spills over into feeding algae. In a no-CO2 tank the plants' growth rate is capped by available carbon, so extra light past that cap goes straight to algae. This is why a low-tech tank runs 6–8 hours of light rather than the 8–10 hours a CO2-injected tank tolerates.
Water hardness stability matters because shrimp build their exoskeleton from dissolved minerals — primarily calcium and magnesium, measured as general hardness (GH). A molting shrimp pulls minerals out of the water column to harden its new shell. If GH is too low, the new shell never hardens properly and the shrimp dies mid-molt, often with the tell-tale "white ring of death" — a visible gap at the junction between carapace and abdomen. If GH swings sharply — say, from a large water change with very different source water — molting gets triggered off-schedule and the same failure occurs.
Copper is the silent killer. Shrimp are invertebrates, and copper is a broad invertebrate toxin. It appears in three common places: some tap water systems with copper plumbing, many fish medications (particularly ich and parasite treatments), and some plant fertilizers that include copper as a trace micronutrient. A dose that a fish shrugs off can wipe an entire shrimp colony overnight.
The interaction between these four is what makes the system self-correcting. Plants consume nitrate, which reduces the water-change burden, which reduces parameter swings, which improves molt success, which grows the colony, which produces more waste for the plants. Break one link — overdose the light, or add a copper-containing medication — and the loop runs backward just as fast.
Benchmarks and realistic ranges
Here are the numbers worth committing to memory. Neocaridina davidi tolerate a wide band, but "tolerate" and "thrive" are different things.
Temperature: 68–78°F, target 72–76°F. Most homes hold this range without a heater at all, which is one of the reasons this species suits a low-tech build. Higher temperatures speed metabolism and breeding but shorten lifespan and reduce dissolved oxygen; at 80°F and above you will see faster reproduction and earlier deaths. At 68°F, breeding slows dramatically but the animals live longer. If your room drops below 65°F in winter, add a small adjustable heater set to 74°F — a 25–50 watt unit handles a 10-gallon tank.
pH: 6.5–7.8. Neocaridina are notably flexible here. What kills them is not a specific pH value but rapid change. A tank sitting stably at 7.6 is completely fine; a tank that swings from 7.6 to 6.8 over a weekend is not.
GH (general hardness): 4–8 dGH. This is the parameter most worth measuring and the one most often neglected. Below 3 dGH you will see molting failures. Above 12 dGH, molting can become difficult in the opposite direction — the shell hardens too fast for the animal to escape it.
KH (carbonate hardness): 2–8 dKH. KH buffers pH against swings. Very low KH (under 1) lets pH crash; the practical fix is a small amount of crushed coral or aragonite in the filter, added gradually.
Ammonia and nitrite: 0 ppm, non-negotiable. Shrimp are more sensitive to ammonia than most community fish. Any detectable reading means the tank is not ready or the biofilter has been damaged.
Nitrate: under 20 ppm, ideally under 10 ppm. Plants handle much of this in a well-planted tank.
TDS (total dissolved solids): roughly 150–300 ppm for Neocaridina. A TDS pen is cheap and gives you a fast proxy for "did my water chemistry drift" without running a full test panel.
On stocking density: start at 10–15 shrimp in a 10-gallon regardless of what the tank could theoretically hold. Starting small lets the biofilter mature alongside the colony. The commonly cited ceiling of five to ten shrimp per gallon is achievable in a mature, heavily planted tank with disciplined water changes, but treat it as an upper bound rather than a target. A 10-gallon holding 60 shrimp is a busy, healthy-looking tank; the same tank at 120 will show stunted growth and more frequent losses.
On cost, a realistic 10-gallon low-tech build lands somewhere in the range of $80–$160 before livestock, depending heavily on whether you buy new or used. The tank itself is the cheapest component. Lighting and the initial plant purchase are usually the two largest line items. The shrimp themselves vary enormously — plain red cherry shrimp are inexpensive and widely available, while high-grade color morphs (deeper reds, blues, oranges) command multiples of that price for genetically identical care requirements. For a first colony, buy the cheap grade. You will learn on animals you can afford to lose, and lower grades are typically hardier because they have been less intensively line-bred.
On timeline: cycling takes four to six weeks with a fishless method. Plants should be in from day one — they seed the tank with bacteria and start consuming ammonia immediately. First berried female typically appears four to eight weeks after stocking. First visible shrimplets follow roughly a month after that. A colony you would describe as "established" arrives at the four to six month mark.
Risks, edge cases, and failure modes
The uncycled tank. The single most common failure is impatience. A tank that looks finished — plants in, water clear, light on — is biologically empty until the bacterial colony is established. Adding shrimp to an uncycled tank produces an ammonia spike that kills them over three to ten days, often with no dramatic symptoms beyond lethargy and a gradual decline in count. The only defense is testing: ammonia and nitrite must both read zero, and the tank must be able to process a deliberate ammonia dose down to zero within 24 hours, before any animal goes in.
Copper contamination. Covered above, but worth restating as a failure mode because it is so often invisible. If you treat a fish disease in a shared tank, or dose a fertilizer without checking the label, you can lose the colony overnight. The rule: no medications in a shrimp tank without confirming they are invertebrate-safe, and check any plant fertilizer for copper content. Some plant fertilizers formulated for shrimp tanks exist specifically because standard ones are not safe.
The molting failure cluster. If you find several dead shrimp over a week, each with a visible white line between the head section and the body, the cause is almost always a GH problem or a sudden parameter swing. Check GH first. The fix is remineralizing water changes toward the 4–8 dGH target, slowly — raising hardness abruptly is itself a shock.
Large water changes with mismatched water. In a fish tank, a 50% water change is routine maintenance. In a shrimp tank it can trigger a mass molt as the animals respond to the sudden change in dissolved minerals, and a mass molt in unstable conditions becomes a mass death. Keep changes to 15–25%, and match temperature and hardness of the replacement water to what is already in the tank.
Hydra and planaria. Both arrive as hitchhikers on plants. Hydra are small stalked cnidarians that can catch and kill shrimplets; planaria are flatworms that prey on weakened shrimp and eggs. The standard treatments carry real risk — some anti-parasitic compounds used against planaria are dangerous to shrimp at incorrect doses. Prevention is far better: quarantine or disinfect new plants before introduction, and avoid overfeeding, since both pests explode in population when there is excess food.
Overfeeding. A colony of 50 shrimp needs a startlingly small amount of food. They graze biofilm continuously; supplemental feeding is a supplement, not their diet. A portion the size of a grain of rice, two or three times a week, is enough for a small colony, and any food not consumed within two to three hours should be removed. Uneaten food drives ammonia, planaria, and hydra simultaneously.
Cherry shrimp color reversion. In a breeding colony, selectively-bred color morphs revert toward wild-type brown-green over generations unless you cull for color. This is not a health problem, but it surprises people. If you want to keep a deep red line red, you remove the poorly-colored offspring from the breeding population — otherwise expect visible drift within three to five generations. Also relevant: different Neocaridina color morphs interbreed freely and their offspring revert quickly, so keep one color per tank if appearance matters to you.
The mature-tank crash. Tanks that have run flawlessly for a year sometimes fail suddenly. The usual causes are a clogged sponge filter that has stopped moving water (check flow weekly — bubbles rising is not proof the sponge is passing water), an active substrate exhausting its buffering capacity and letting pH drift, or accumulated organic matter in a substrate that has never been vacuumed.
A practical rollout plan
Week 0 — hardware. Set the tank on a level, load-bearing surface. Rinse substrate if using sand; do not rinse active plant substrate, which turns to mud. Lay 1–2 inches of substrate, sloping slightly higher at the back. Install the sponge filter and air pump — put the pump above water level or install a check valve so a power outage cannot siphon tank water into it. Add hardscape: driftwood and inert stone. Fill slowly, pouring onto a plate or your hand so you do not crater the substrate. Treat the water with a dechlorinator that neutralizes both chlorine and chloramine.
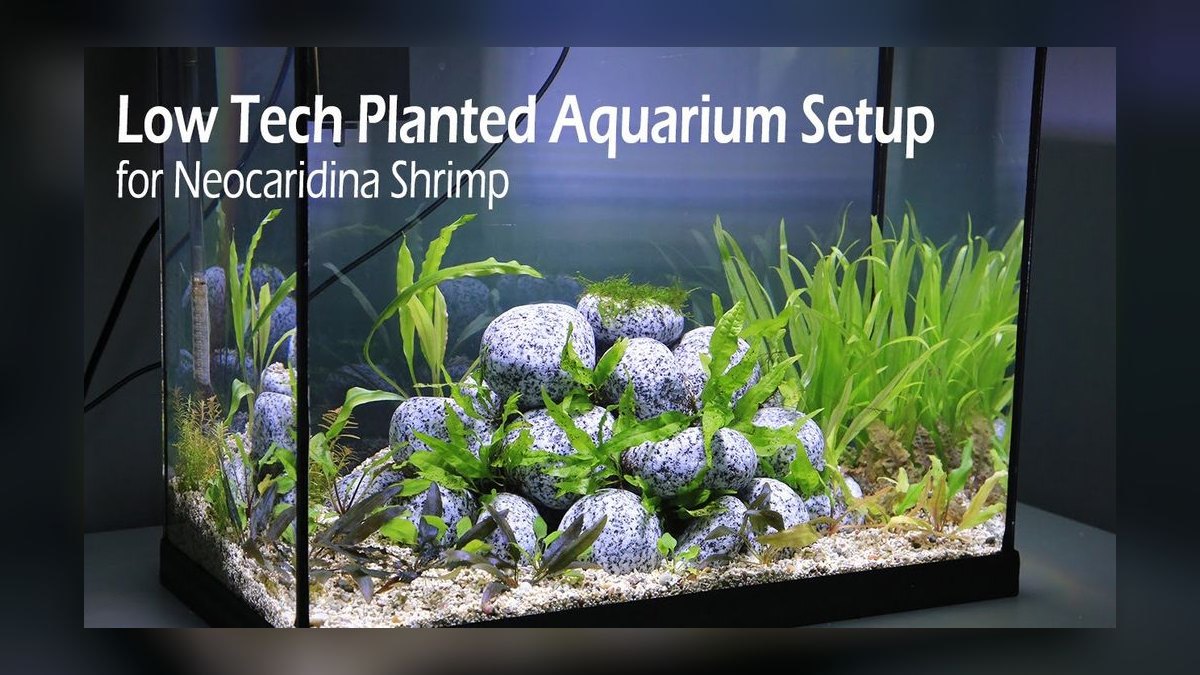
Week 0–1 — plants and cycle start. Plant immediately. Java fern and Anubias must have their rhizome — the thick horizontal stem — above the substrate, tied or glued to wood or stone; burying the rhizome rots the plant. Mosses tie to hardscape or sit in mats. Hornwort floats or anchors loosely. Start the light at 6 hours a day on a timer. Begin the fishless cycle: dose ammonia to roughly 2 ppm using pure ammonium chloride, or drop in a small pinch of fish food every other day and let it decay. A bottled bacteria starter can shorten the process, and a squeeze of filter media or a handful of substrate from an established, disease-free tank shortens it more than any bottled product does.
Weeks 1–5 — cycling. Test ammonia and nitrite every two to three days. The pattern to watch for: ammonia rises, then falls as nitrite rises, then nitrite falls as nitrate appears. You are cycled when a 2 ppm ammonia dose processes to zero ammonia and zero nitrite within 24 hours. Expect a brown diatom bloom somewhere in this window — it is normal in new tanks and passes on its own. Do not fight it.
Week 5–6 — pre-stocking checks. Do a 25% water change to bring nitrate down. Measure GH, KH, and pH on both tank water and your source water, and write the numbers down — you will want that baseline every time something goes wrong later. If GH sits below 4 dGH, add a shrimp-specific remineralizer or a small amount of crushed coral to the filter and let it stabilize for a week before stocking.
Week 6 — stocking and acclimation. Buy 10–15 shrimp from a seller whose water parameters you can ask about. Drip acclimate: float the sealed bag 15–20 minutes to match temperature, then transfer shrimp and bag water into a small container and run an airline siphon from the tank with a knot or valve throttling it to one to two drops per second. Over 60–90 minutes the container volume should roughly double or triple. Net the shrimp into the tank; discard the acclimation water rather than pouring it in. Leave the light off for the rest of the day and do not feed for 24 hours.
Ongoing maintenance. Weekly: a 15–25% water change with temperature- and hardness-matched water, glass wiped, any uneaten food removed. Feed two to three times a week in tiny amounts. Monthly: squeeze the sponge filter out in a bucket of removed tank water — never under the tap, since chlorine kills the bacterial colony you spent six weeks building. Quarterly: trim fast growers, remove yellowing leaves, and spot-vacuum visible detritus in open substrate areas without disturbing the planted zones. That is the entire ongoing commitment, and it is why the low-tech approach earns its name.
Related questions
Do I need a heater for a shrimp tank?
Usually not. Neocaridina do well at 68–78°F, which most heated homes hold year-round. Add a 25–50 watt adjustable heater set to 74°F only if your room drops below 65°F seasonally.
Can shrimp live with fish in a low-tech planted tank?
Small peaceful species like Otocinclus or pygmy corydoras coexist well. Most fish will eat shrimplets, so a mixed tank rarely grows a colony — heavy moss cover improves survival odds but does not eliminate predation.
How long do cherry shrimp live?
Typically one to two years, with females often reaching the longer end. Cooler water extends lifespan and slows breeding; warmer water does the reverse. Deaths in an established colony are usually old age rather than water quality.
Do I need CO2 for a planted shrimp tank?
No. That is the defining choice of a low-tech build. Java fern, Anubias, mosses, and hornwort grow adequately on ambient CO2 and shrimp waste. CO2 injection speeds growth but adds cost, equipment, and a pH-swing risk shrimp handle poorly.
Why do my shrimp hide all the time?
New shrimp hide for several days while acclimating. Persistent hiding after two weeks usually means a water parameter problem, insufficient cover, or the presence of a predator. Add moss and leaf litter, and test ammonia, nitrite, and GH.
FAQ
How long does it take to cycle a low-tech shrimp tank?
Four to six weeks with a fishless cycle, and there is no reliable shortcut beyond seeding the filter with media from an established, healthy tank. The finish line is a specific test result, not a date on the calendar: dose ammonia to about 2 ppm and confirm the tank clears it to zero ammonia and zero nitrite within 24 hours. Until that happens, the biofilter cannot handle a stocked tank.
Can I use tap water for a shrimp tank?
In most municipalities, yes, after treating it with a conditioner that neutralizes chlorine and chloramine. Test the general hardness first — cherry shrimp want roughly 4–8 dGH. Very soft tap water needs a shrimp-specific remineralizer; very hard tap water can be cut with RO or distilled water. If your home has old copper plumbing, run the tap for a minute before collecting water, since copper leaches into standing pipe water overnight.
What plants survive in a low-tech planted shrimp tank without CO2?
Java fern, Anubias, Java moss, Christmas moss, and hornwort are the reliable core. Cryptocoryne species also do well but need root tabs in inert substrate and sulk with a leaf melt after transplanting before recovering. Floating plants like frogbit or dwarf water lettuce grow fast, shade the tank, and export nitrate efficiently. Avoid demanding carpeting plants — they generally require CO2 and high light.
Why are my shrimp dying one at a time?
Work through the causes in order of likelihood. Test ammonia and nitrite first — any reading above zero is the answer. Then check GH, since molting failure shows up as a visible white gap between carapace and abdomen on the body. Then consider copper from a medication, a fertilizer, or plumbing. Then consider temperature swings or oversized water changes. Losses concentrated in the first two weeks after purchase are usually transport stress rather than tank conditions.
How many shrimp should I start with in a 10-gallon tank?
Ten to fifteen. That group is large enough to virtually guarantee both sexes and to give the shrimp the social density they behave normally at, while being small enough that a young biofilter can handle the bioload. The colony grows from there on its own — expect 40 to 80 animals by month four, at which point you can rehome the surplus or move to a larger tank.
Do I need a special filter for shrimp?
A sponge filter driven by an air pump is the standard choice, and for good reason: it cannot suck in 2mm shrimplets, it provides large bacterial surface area, and its gentle flow suits animals that are weak swimmers. If you prefer a hang-on-back or canister filter, cover the intake with a fine sponge pre-filter — without one, you will lose shrimplets into the filter chamber continuously.
Sources
- Fluval Aquatics — Plant and Shrimp Stratum
- Seachem — Prime
- Seachem — Stability
- API Fish Care — Freshwater Master Test Kit
- Smithsonian's National Zoo & Conservation Biology Institute
- University of Florida IFAS Extension — Aquaculture and Fisheries
- The Spruce Pets — Freshwater Aquariums
- Tropica Aquarium Plants — Plant Guide
- U.S. EPA — Drinking Water Regulations for Copper
Related on PULSE
- [How do you set up a planted aquarium for beginners?](/knowledge/aq0987)
- [How do you set up a shrimp-only aquarium?](/knowledge/aq1105)
- [How do you set up a betta fish tank?](/knowledge/aq1113)
- [How to set up a hospital tank for fin rot without medicating the main display?](/knowledge/aq0479)
- [How do you set up an African cichlid aquarium?](/knowledge/aq1125)
- [Top 10 Aquarium Moss Species for Aquascaping](/knowledge/aq1128)
 pulse-aquariumsTop 10 Aquariums strategies for 2027
 pulse-aquariumsTop 10 Clownfish Varieties for Saltwater Aquariums in 2027
 pulse-aquariumsTop 10 Reef-Safe Tangs for Saltwater Aquariums in 2027
 pulse-aquariumsTop 10 Aquarium Air Pumps in 2027
 pulse-aquariumsHow do you choose the right filter for your aquarium?
 pulse-aquariumsHow do you set up a planted aquarium for beginners?
 pulse-aquariumsTop 10 Aquarium Controllers for Smart Tanks in 2027
 pulse-aquariumsHow do you treat ich in a freshwater aquarium?
 pulse-aquariumsHow do you raise water hardness in a shrimp tank?
 pulse-aquariumsWhat are dinoflagellates and how do you get rid of them in a reef tank?