
How do you keep aquarium plants from melting after planting?
 Curated byKory White · Fractional CRO · Maryland
 PULSEKNOWLEDGE LIBRARY
Quality
Certified
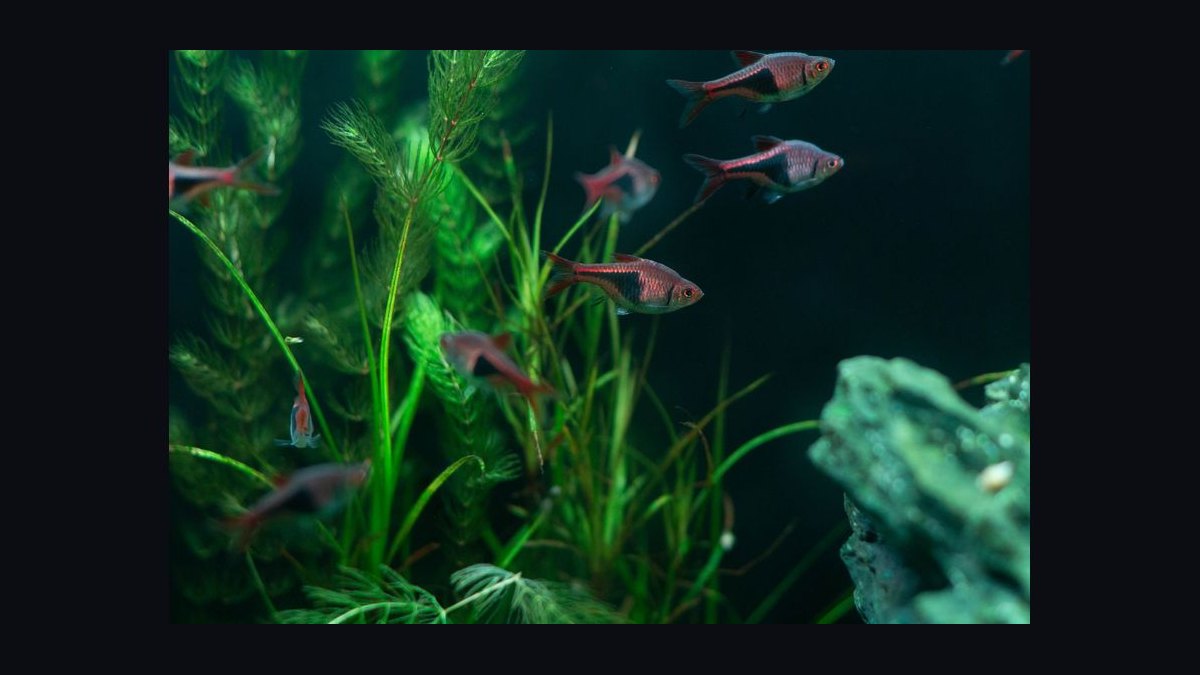
Melting happens because store plants grow emersed and must rebuild submerged leaves. Prevent it by trimming damaged tissue before planting, keeping temperature, pH and hardness stable, starting at a 6–7 hour photoperiod, dosing fertilizer at half strength, adding carbon, and removing rotting leaves promptly so ammonia never spikes.
What melting actually is and why it decides your first month
Almost every aquarium plant sold in a cup, a pot, or a bunch was grown emersed — roots in a wet medium, leaves in humid air above the waterline. Nurseries do it that way because emersed growth is faster, algae-free, and easier to ship. The leaves those plants arrive with are built for air: thicker cuticles, waxy surfaces, stomata tuned to pull CO2 out of the atmosphere at roughly 400 ppm. Drop that leaf under water and it is suddenly trying to breathe through a straw. Dissolved CO2 in an unfiltered, uninjected tank often sits around 2–4 ppm, and gas diffuses through water thousands of times slower than through air. The leaf cannot pay for itself anymore.
So the plant does the economically rational thing: it liquidates. It pulls mobile nutrients — nitrogen, phosphorus, magnesium, potassium — back out of the doomed emersed foliage and reinvests them in producing new, thinner, softer submerged leaves and in pushing roots into the substrate. The visible result is what hobbyists call melting: leaves go translucent, then yellow-brown, then slimy, and eventually dissolve. It looks like death. In most cases it is a controlled retreat.
That distinction matters more than any product you can buy. If you understand that melting is a *conversion cost* rather than a disease, your job changes from "stop the leaves from dying" to "make the conversion cheap and keep the wreckage from poisoning the tank." Those are two different problems and they need two different sets of habits. The conversion is made cheap by stable water, appropriate light, and available carbon. The wreckage is managed by pruning, siphoning, and water changes.
There is a second reason melting deserves your attention beyond aesthetics. Decaying plant tissue is nitrogenous waste. In a newly set up aquarium with an immature biofilter, a heavy melt event across a fully stocked scape can release enough ammonia to stall the cycle, burn fish gills, and trigger a diatom or green-water bloom that then shades the very plants trying to recover. Melting is therefore an upstream event: it drives water chemistry, algae pressure, and livestock safety downstream. Treating it as a cosmetic issue is how a two-week transition turns into a two-month rebuild.
The same physiology shows up in adjacent situations, which is worth knowing because it lets you predict trouble instead of reacting to it. Moving plants between two established tanks with different hardness produces a milder version of the same melt. Rescaping — pulling up and replanting mature stems — triggers root-loss melt even though nothing about the water changed. Recovering from a CO2 outage, a heater failure, or a two-week vacation with no dosing produces melt from the opposite direction: submerged-adapted leaves losing the conditions they were built for. In every case the plant is re-budgeting after a change in operating conditions, and in every case the fix is the same trio — stabilize, reduce demand, remove the debris.
The step-by-step planting protocol that keeps melt short
The work that determines whether a plant sails through transition or collapses happens in the twenty minutes before it touches your substrate and in the ten days after. Here is the sequence.
Inspect and unpack. Take the plant out of its pot or cup. Rock wool and tissue-culture gel both need to go — rock wool traps detritus and rots, and residual gel is a sugar source that clouds water and feeds bacterial blooms. Rinse tissue-culture plants under lukewarm water until the gel is entirely gone. For potted plants, tease the rock wool apart under running water rather than pulling the plant free, which shears roots.
Temper, don't shock. Float the bag or set the plants in a container of tank water for 15–20 minutes so temperature equalizes. If you are moving plants between water that differs sharply in hardness — say a soft RO-remineralized tank receiving plants grown in hard tap water — a slow drip acclimation over 30 minutes at 1–2 drops per second is cheap insurance. Plants are less osmotically fragile than shrimp, but sensitive genera notice.
Trim before you plant, not after. Cut away every leaf that is already yellow, holed, mushy, or translucent, using sharp scissors so you crush as little tissue as possible. A leaf that is 40% gone is a net drain — it costs the plant maintenance energy and it will rot in your tank. On stem plants, strip the lower 1–2 inches of leaves and cut the stem base at an angle; buried leaves rot every single time. On rooted plants like swords and crypts, trim roots back to roughly 1–2 inches to encourage branching, but never remove more than about a quarter of the root mass.
Plant to the correct depth. This single detail causes more avoidable "melting" than anything else. Rhizome plants — Anubias, Java fern, Bucephalandra — must have the horizontal rhizome fully exposed above the substrate; bury it and it rots within weeks, which people misread as melt. Attach them to wood or stone with thread, cyanoacrylate gel, or a plant weight. Crown-forming plants like Echinodorus and Cryptocoryne need the crown at or just above substrate level with roots below. Stem plants go in 1–2 inches deep, one stem per hole, spaced enough that light reaches the base. Carpeting plants should be split into small portions of a few runners each and pushed in with tweezers.
Set light conservatively. Start at 6–7 hours at moderate intensity. Light drives demand; if the plant cannot meet that demand with available carbon, the surplus energy goes to algae. You can always add an hour a week later. A common trajectory is 6 hours for two weeks, 7 hours for week three, then 8 hours once new submerged growth is clearly established.
Provide carbon in whatever form you run. Pressurized CO2 injected to a stable level and turned on an hour before lights is the fastest route through transition — it is the difference between three weeks and six for demanding species. If you do not run CO2, keep light and demand correspondingly low; liquid carbon products based on glutaraldehyde offer a modest benefit and also act as a mild algaecide, though some species, notably Vallisneria and certain mosses, react badly to them.
Dose at half strength for two weeks. A stressed plant with reduced leaf surface cannot use a full nutrient load. Excess nutrients plus melting organics is a reliable algae recipe. Root feeders — crypts, swords, Vallisneria — benefit far more from root tabs pushed 1–2 inches into the substrate near the root ball than from water-column dosing during this window.
Reduce flow at the planting sites. Direct filter output uproots fresh stems and shreds soft new leaves. A spray bar, a flow deflector, or simply aiming the return along the back glass gives you gentle circulation with good surface exchange.
Then leave it alone. Do not pull plants up to check the roots. Root establishment is the entire point of the first two weeks, and every uprooting resets the clock.
Timelines, ranges, and what the transition actually costs
Melting is a schedule, not an event, and knowing the schedule keeps you from intervening at the wrong moment.
The first 48 hours are usually quiet. Emersed leaves still look fine; damage is being decided at the cellular level. Do not read early calm as success.
Days 3–10 are the visible melt. Expect the heaviest leaf loss here. Crypts can shed nearly everything. Stem plants drop lower leaves and may look leggy. Carpeting plants can go pale and thin across the whole mat.
Days 10–21 are the turn. New submerged leaves emerge — narrower, softer, often a lighter green than what came in the cup. On stems, watch the growing tip; on crypts, watch for small new leaves pushing from the crown; on carpets, look for runners spreading horizontally.
Weeks 4–6 are consolidation. Growth accelerates as root systems establish, and this is when you begin raising the photoperiod and returning fertilizer dosing to full strength.
For a plant that arrives in genuinely poor condition, or a crypt that melts to nothing, give it four to six weeks before declaring it dead. An intact rhizome and root system regenerate foliage long after every original leaf is gone. Digging it up at week two to check almost guarantees the failure you were worried about.
Practical parameter ranges for the transition window: temperature in the 72–78°F / 22–26°C band for most common tropical species, with the important caveat that *stability matters more than the exact number*. Above roughly 82°F, bacterial breakdown of melted tissue accelerates sharply and the ammonia load rises with it. pH in the 6.5–7.5 range suits most stocked plants, with CO2-injected tanks running lower. Carbonate hardness of roughly 3–8 dKH gives you enough buffer that a CO2 system or a large water change does not swing pH abruptly; below about 2 dKH, pH becomes twitchy and swings are themselves a melt trigger.
Water change cadence during the melt window should be 30–50%, two to three times weekly. That sounds aggressive compared to a mature planted tank's weekly 25%, and it is deliberate: you are diluting ammonia from decaying tissue, exporting dissolved organics that feed algae, and resetting nutrient balance for plants that are not yet consuming much. Match temperature and dechlorinate every time — chlorine and chloramine damage the leaf surface biofilm and the substrate bacteria you need.
On cost, the honest ranking of what buys you the most reduction in melt per dollar is: tissue culture or already-submerged stock first, since plants grown or held under water skip most of the conversion entirely; stable heating and reliable dechlorination second, because they cost little and prevent the swings that trigger repeat melts; a decent programmable light third, mostly for the ability to run a short photoperiod at controlled intensity; and pressurized CO2 last in order of necessity but first in order of effect for demanding carpets and red stems. Choosing forgiving species is free and outperforms all of it.
Where aquarists get this wrong
Panic-pulling. The plant looks dead, so it gets yanked, inspected, and replanted — which destroys the exact root growth that would have saved it. If the rhizome or crown is firm and the roots are white or tan rather than brown mush, the plant is alive. Leave it.
Escalating light. The instinct when plants look sick is to give them more light. During melt this is backwards. Reduced leaf area means reduced uptake; extra light becomes algae fuel and adds photo-oxidative stress to tissue that is already struggling. Cut the photoperiod, don't extend it.
Over-dosing to "help." Same instinct, same error. Half strength for two weeks. Nutrient deficiency is rarely what kills a newly planted tank; unconsumed nutrients plus decaying organics plus long light is what does.
Leaving debris in the tank. Melted leaves that dissolve in place release ammonia over days and blanket the substrate in mulm. Siphon with a turkey baster and tweezers every two or three days during the heavy melt phase. This is the single highest-return chore of the first month.
Burying rhizomes. Anubias and Bucephalandra do not melt from transition — most are sold submerged-grown. When they go translucent it is almost always rhizome rot from being planted in substrate. Tie or glue them to hardscape instead.
Planting everything at once in a new tank. A full scape planted into a tank with no biofilter capacity means a large simultaneous melt with nothing to process the ammonia. Stagger planting in batches over two or three weeks, or accept heavy water changes.
Blaming the wrong culprit. Holes and translucent patches on *older established* leaves with healthy new growth usually mean a nutrient issue, not transition melt. Melt affects the imported leaves first and spares the new ones. If new growth is what's failing, look at planting depth, root rot, ammonia, or a parameter swing.
Adding fish and shrimp mid-melt. The ammonia curve during a heavy melt is the worst possible time to stock. Wait until melt has clearly subsided and ammonia and nitrite read zero for several consecutive days.
Species behavior and a framework for choosing what to plant
Matching species to conditions removes more melting risk than any technique, so it is worth being blunt about which plants punish which mistakes.
Cryptocoryne — wendtii, parva, lutea, undulata — are the archetypal melters. Any disturbance or parameter swing can strip them to bare stems within days. They also recover more reliably than almost anything else, provided the roots stay untouched. Plant them once, in a spot you will not rescape, add a root tab, and then ignore them for a month.
Stem plants — Rotala, Ludwigia, Bacopa, Hygrophila — rarely melt outright. They shed lower leaves and stall while converting their growing tips. Judge them by the tip. If the base rots, cut the healthy top and replant it; the top will root readily.
Carpeting plants — Monte Carlo, dwarf hairgrass, Hemianthus callitrichoides — are the most demanding because the emersed and submerged forms differ most dramatically and because they sit lowest in the tank, where light is weakest and flow is poorest. They benefit enormously from a dry start: plant into damp substrate, cover the tank to hold humidity, run lights normally, and let the plants establish emersed for four to eight weeks before flooding. Rooted carpets flooded slowly barely melt at all.
Rhizome plants and mosses — Anubias, Java fern, Bucephalandra, Vesicularia — are the safe harbor. Slow, tolerant, attachable, indifferent to substrate, and usually sold submerged. If you are new, or setting up a tank you cannot babysit, weight your first order toward these.
Vallisneria and Sagittaria melt on introduction with some regularity, particularly into harder or CO2-injected water, then recover through runners once established. They are also notably sensitive to glutaraldehyde-based liquid carbon.
Beyond species, the framework question is what you are optimizing for. If it is *low effort*, choose hardy rhizome and hardy stem plants, no CO2, a 6–7 hour photoperiod, and accept slow growth. If it is *fast, lush growth*, run CO2, higher light, full dosing, and accept that you must be present and consistent — an unattended CO2 tank melts harder than an unattended low-tech tank because the plants are adapted to abundance and lose it abruptly. If it is *a specific demanding carpet*, dry start it. If it is *a rescape of an existing tank*, expect a second melt cycle from root loss and reduce light and dosing for two weeks exactly as you would for new planting.
Reading the tank while it recovers
The skill that separates aquarists who beat melt from those who fight it for months is observation before intervention. Each day, ask two questions.
First: is the new growth healthy? Firm, correctly colored new leaves emerging while old ones thin and pale is a textbook successful transition, no matter how ugly it looks. New growth that is itself soft, stunted, or rotting is a different problem — check that crowns are not buried, that roots are not sitting in an anaerobic pocket, that ammonia is not elevated, and that nothing swung sharply.
Second: is the old tissue decaying cleanly or fouling the water? Leaves that thin out and detach are fine. Slimy biofilm spreading across the substrate, cloudy water, or a sour smell means decomposition is outrunning your export. Increase siphoning and water change frequency rather than adding any product.
Algae is your third signal, and a genuinely useful one. Diatoms (brown dust) and green spot appearing during melt tell you the light-to-uptake ratio is wrong. The correct response is to reduce the photoperiod, increase water change frequency, and keep siphoning organics — not to buy an algaecide. As plant uptake recovers over weeks three and four, that algae typically recedes on its own.
Test ammonia and nitrite during heavy melt in a newly set up aquarium, especially one with livestock. A reading above roughly 0.25 ppm ammonia calls for an immediate water change and a hard look at how much dead tissue is still sitting in the scape.
Finally, build the long-term habits that stop the cycle from repeating. Quarantine and pre-soak new arrivals in dechlorinated water at tank temperature for a day or two, which begins acclimation and lets you spot pest snails and algae before they enter the display. Stagger new planting into batches. Keep parameters boring — a consistent dosing schedule and a reliable heater prevent more melt than any additive. And resist the rescue reflex: the hardest and most valuable thing you can do while an aquarium plant looks terrible is nothing at all.
Related questions
Is melting the same thing as a plant dying?
No. Melting is the plant shedding air-grown leaves to fund new submerged ones. If the rhizome, crown, or stem is firm and roots are white or tan, it is alive. Mushy, brown, foul-smelling tissue throughout means it is dead.
Do tissue culture plants melt less?
Generally yes, when they are grown or held submerged. Rinse all gel off before planting. They arrive pest-free and in small portions, which suits carpeting. Some tissue culture stock is still emersed-form, so it can melt like anything else.
Should I add CO2 just to stop melting?
CO2 shortens the transition and is close to mandatory for demanding carpets and red stems, but it is not required for hardy species. An unreliable CO2 setup is worse than none, because outages cause their own melt.
Why did my established plants melt after a rescape?
Uprooting destroys root mass, which triggers the same re-budgeting as a new planting — crypts especially. Treat a rescape exactly like a fresh planting: reduce light, halve dosing, siphon debris, and give it three to four weeks.
Can melting hurt my fish?
Yes, indirectly. Decaying leaves release ammonia. In a new tank with an immature filter, a heavy melt can spike ammonia enough to stress or harm livestock. Remove melted tissue promptly and increase water changes.
FAQ
How long does aquarium plant melting last?
Typically the heavy phase runs about 7–14 days, with new submerged leaves visible within two to three weeks. Slow species like Cryptocoryne may take four weeks to show recovery. If melting continues past three to four weeks with no new growth at all, investigate planting depth, root rot, ammonia, or an unstable parameter rather than assuming a slow start.
Should I remove melted leaves or let them dissolve?
Remove them. Use tweezers for attached leaves and a turkey baster or siphon for loose debris, every two or three days during the heavy melt phase. Leaves left to dissolve release ammonia, blanket the substrate in mulm, and fuel algae. Pruning a partly damaged leaf back to healthy tissue is fine if the rest of the leaf is still functional.
Does more fertilizer help a melting plant?
No. Halve your dosing for the first two weeks. A plant with reduced leaf area cannot use a full nutrient load, and the surplus combines with decaying organics to feed algae. Root feeders like crypts and swords get more benefit from a root tab near the root ball than from water-column dosing during this window.
What temperature is safest during the transition?
Roughly 72–78°F / 22–26°C for most common tropical species, but stability matters more than the exact figure. Above about 82°F, bacterial decay of melted tissue accelerates and the ammonia load climbs. Cooler water slows metabolism and stretches recovery out. A reliable heater is one of the cheapest melt-prevention purchases available.
Why did my Anubias turn translucent when it never melted before?
Almost certainly rhizome rot from being buried, not transition melt. Anubias and Bucephalandra are usually sold submerged-grown and rarely melt. The rhizome must sit fully above the substrate, tied or glued to wood or stone. Cut away any soft brown rhizome sections and re-attach the firm remainder.
Can I prevent melting entirely?
Not entirely, but you can make it minor. Buy submerged-grown or tissue culture stock, choose forgiving species, dry start carpets, trim before planting, plant at the correct depth, run a short photoperiod, dose at half strength, and hold parameters steady. Done together, these reduce melt to a few shed leaves rather than a total collapse.
Sources
- Aquarium Co-Op — Aquarium Plant Care and Melting
- Tropica — Plant Care and Guides
- Seachem — Flourish Excel product information
- Buce Plant — Planted Tank Guides
- Dennerle — Aquarium Plants and Care
- The Green Machine — Aquascaping Tutorials
- University of Florida IFAS — Aquatic Plants
- ADA (Aqua Design Amano) — Nature Aquarium
Related on PULSE
- [Top 10 Aquarium Aquascaping Tools for Precision Planting](/knowledge/aq0789)
- [Top 10 Aquarium Background Plants for Aquascaping](/knowledge/aq1138)
- [How do you keep a goldfish tank healthy?](/knowledge/aq1131)
- [How do you keep a betta and other fish together peacefully?](/knowledge/aq1139)
- [Can I keep multiple male fancy guppies together without aggression?](/knowledge/aq0480)
This page will be disappearing soon. Save it to your device for $1 — or read it free while it is here.
@Kory-White- · if Venmo asks, the last 4 of my number are 2012
 pulse-aquariumsHow do you do a fishless cycle with ammonia?
 pulse-aquariumsTop 10 Aquarium Sand Substrates for Saltwater Tanks in 2027
 pulse-aquariumsTop 10 Freshwater Aquarium Plants for Beginners in 2027
 pulse-aquariumsWhat is the true cost of a rimless 90-gallon planted tank with a canister filter and CO2 in 2027
 pulse-aquariumsTop 10 Aquarium Wave Pump Brands in 2027
 pulse-aquariumsHow do you set up a planted aquarium for beginners?
 pulse-aquariumsWhat is the nitrogen cycle in an aquarium?
 pulse-aquariumsWhat should you know before investing in Aquariums in 2027?
 pulse-aquariumsTop 10 Aquarium Air Pumps in 2027
 pulse-aquariumsTop 10 Nano Saltwater Corals for Beginners in 2027