
How do I set up my first gaming PC in 2027?
 Curated byKory White · Fractional CRO · Maryland
 PULSEKNOWLEDGE LIBRARY
Quality
Certified
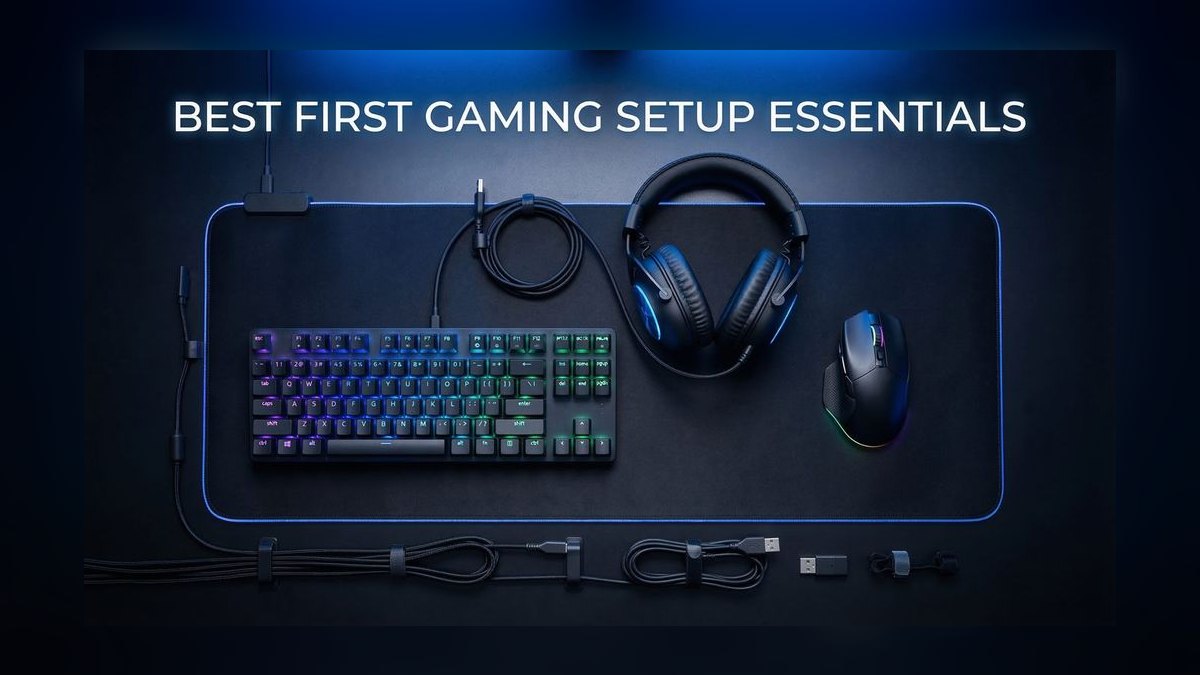
Building your first gaming PC in 2027 takes about three to five hours: pick a GPU that matches your monitor's resolution and refresh rate, size the CPU and power supply around it, then assemble outside the case first to test-boot. Budget roughly $900–$1,400 for solid 1440p performance, install Windows from a USB stick, and update drivers before your first game.
The build that almost didn't post
Picture a first-timer with a cardboard box of parts on the dining table. The GPU cost more than everything else combined, the case has a glass side panel, and the instructions consist of six different manuals in four languages. Four hours later they press the power button and nothing happens. No fans, no lights, no beep.
This is the single most common first-build experience, and it is almost never a dead component. In practice the culprit is one of four things: the 8-pin EPS power cable for the CPU is unplugged (it lives at the top-left of the motherboard, easy to miss behind the cooler), the front-panel power switch header is on the wrong pins, the RAM is not fully seated (it takes more force than feels safe — you want an audible click on both ends), or the case standoffs are shorting the board against the tray.
The scenario matters because it dictates the correct build order. If you assemble everything inside the case first, diagnosing a no-post means undoing three hours of cable management. If you instead do a bench test — motherboard on top of its own antistatic box, CPU, cooler, one stick of RAM, GPU, PSU, nothing else — you find the problem in ten minutes with everything accessible. Jump the power pins with a screwdriver across the two PWR_SW pins, watch for the motherboard's debug LEDs or seven-segment code, and confirm you reach BIOS before a single screw goes into the case.

The second thing this scenario reveals: the parts list should be settled before anything ships. Returns are the expensive part of a bad build, not the components. A first-time builder who orders a 1000W power supply for a 250W graphics card has wasted $60; one who orders a CPU cooler that fouls the top RAM slot has wasted a week. Both are avoidable with fifteen minutes of compatibility checking against the motherboard's QVL (qualified vendor list) and the case manufacturer's published clearance specs for cooler height and GPU length.
Adjacent to the build itself is the part people forget to budget: the *rest of the desk*. A 1440p 165 Hz monitor, a decent mechanical keyboard, a mouse that doesn't lag, and a headset can easily add $400–$600. Plenty of first builds end up with a $1,200 tower feeding a $110 1080p 60 Hz panel it bought in 2020, which throws away most of what the GPU can do. Budget the whole system, not just the box.
How the parts actually talk to each other
A gaming PC is not a bag of independent components — it's a chain where each link constrains the next, and understanding the chain is what stops you from overspending on the wrong piece.
Start at the display, because the display defines the workload. A 1080p 144 Hz monitor asks for roughly 2.1 million pixels per frame; 1440p asks for 3.7 million; 4K asks for 8.3 million. That's the demand signal. The GPU is what supplies it, and GPU choice should be reverse-engineered from resolution and target frame rate rather than from a budget number pulled out of the air.
The CPU's job is to prepare frames for the GPU — game logic, draw calls, physics, AI. When the CPU can't feed the GPU fast enough you get a CPU bottleneck, visible as GPU utilization sitting at 60–70% while frame rate stays flat no matter how far you drop the settings. The inverse, a GPU bottleneck, shows GPU utilization pinned near 99–100%, and it's the *desirable* state for gaming: it means you're getting everything you paid for out of the expensive part.
Crucially, bottlenecks are resolution-dependent. The same CPU that limits you at 1080p may be completely irrelevant at 4K, because at higher resolutions the GPU takes so much longer per frame that the CPU has time to spare. This is why "will this CPU bottleneck my GPU?" is an unanswerable question without a resolution attached.
Memory sits alongside as a capacity gate rather than a speed dial. Below the threshold, games stutter as assets swap; above it, more RAM does almost nothing for frame rate. Storage works the same way: an NVMe SSD dramatically cuts load times and texture-streaming hitches versus a hard drive, but going from a mid-range NVMe drive to the fastest available one is largely invisible in games.
Power and thermals wrap around all of it. The PSU must supply peak transient draw, not just average draw — modern GPUs spike well above their rated board power for milliseconds at a time, and an undersized supply trips its protection and shuts the machine off mid-game. Cooling determines whether your parts run at their rated boost clocks or throttle back; a CPU hitting its thermal limit doesn't crash, it just quietly gets slower.
One more link people miss: the motherboard chipset determines whether the CPU can be overclocked, how many M.2 slots run at full speed, and how many USB ports you get. Budget boards frequently share bandwidth between the second M.2 slot and some SATA ports, so adding a drive silently disables a connector. Read the block diagram in the manual before assuming you have room to expand.
Real numbers: what each tier costs and delivers
Prices move constantly, so treat these as ratios and shapes rather than quotes — check current retail before you buy, and expect GPU pricing in particular to swing with supply.

The entry tier — roughly $700–$900. Targets 1080p at high settings, 60–100 fps in most titles, and competitive esports titles well above 144 fps. Six or eight CPU cores, 16 GB of RAM, a 1 TB NVMe SSD, a mid-range GPU with 8–12 GB of video memory, and a 550–650W power supply. This tier plays everything; it just won't max ray tracing.
The mainstream tier — roughly $1,100–$1,500. This is the sweet spot for most first builds. Targets 1440p at high settings, 90–144 fps. Eight cores, 32 GB of RAM (the practical new baseline — 16 GB now hitches in a handful of demanding open-world titles), 2 TB of NVMe storage, a GPU with 12–16 GB of VRAM, and a 750–850W supply. The jump from entry to mainstream buys roughly 60–80% more frames for roughly 50% more money, which is the best value inflection on the curve.
The high-end tier — $2,000 and up. Targets 4K, or 1440p at 240 Hz. This is where diminishing returns bite hard: the last 20% of performance routinely costs 60–100% more. Justified if you already own a 4K high-refresh display or you're doing GPU-heavy work outside gaming.
Some component-level rules of thumb worth internalizing:
- VRAM is the quiet killer. A card with strong raw performance but only 8 GB of video memory will hit a wall at 1440p with high textures — frame *rate* looks fine on average but you get periodic hard stutters as textures swap. For a build you want to keep three-plus years, 12 GB is the floor and 16 GB is comfortable.
- PSU sizing: add up CPU peak power and GPU board power, then add roughly 150W for everything else, then add 30% headroom for transients and efficiency. A 200W CPU plus a 300W GPU lands around 850W. Buy an 80 Plus Gold unit or better from a reputable manufacturer with a 7–10 year warranty; this is the one component whose failure can take others with it.
- Storage: 1 TB fills faster than you expect — several modern titles exceed 100 GB installed. Two drives (a fast boot drive plus a larger secondary) usually beats one giant drive for the same money.
- Cooling: a good $35–$50 air cooler handles nearly any mainstream CPU. Liquid AIO coolers make sense for the highest-power chips or for clearance reasons, not as a default.
- Case airflow: three intake fans in front, one exhaust in the rear is the standard positive-pressure layout and is worth more than any exotic cooler. Restrictive front panels can cost 5–10 °C on GPU temperatures versus a mesh front.
For assembly time, budget 2–3 hours for the physical build if you're careful, 30–45 minutes for Windows installation from a USB stick made with the official Media Creation Tool, and another 30 minutes for chipset drivers, GPU drivers, and enabling the memory profile in BIOS (XMP on Intel platforms, EXPO on AMD). That last step is the most commonly skipped one — RAM runs at a slow default speed until you turn the profile on, and it's worth several percent of frame rate for a single click.
Build, buy, or upgrade — and what you give up
Building isn't automatically correct. The honest comparison:

Building yourself gets you exact part choice, no bloatware, individual component warranties, and genuine knowledge of your own machine — which pays off every time something goes wrong later. The cost is your time, the risk of a mistake being yours to eat, and no single phone number to call when the whole system misbehaves. The savings versus prebuilts have narrowed considerably; on a mainstream configuration you might save 5–15%, and during GPU shortages prebuilts have occasionally been *cheaper* than the sum of their parts because system integrators get volume allocation.
A prebuilt gives you one warranty, one support line, and a machine that works out of the box. The classic trap is a strong CPU and GPU paired with a no-name power supply, a proprietary motherboard that blocks future upgrades, and a case with almost no airflow. Check the specific PSU model and the case, not just the headline parts.
A gaming laptop trades roughly 15–25% of performance per equivalent GPU tier for portability, runs hotter and louder, and can't be meaningfully upgraded beyond RAM and storage. It's the right call if you genuinely move around; it's an expensive compromise if the machine will live on one desk.

Console versus PC is worth an honest look. A console is cheaper up front, guaranteed to run its library, and requires zero configuration. The PC advantages are frame rate ceiling, mod support, a vastly larger and more heavily discounted game catalog, backward compatibility across decades, and the fact that it's also a work machine. If you only play a handful of AAA titles a year, a console is a rational choice.
Upgrading an existing machine deserves consideration if you already own a PC less than about five years old. Dropping a modern GPU into an older system frequently doubles frame rate for a fraction of a full build's cost — check that the PSU has the right connectors and enough wattage, and that the case will physically fit the card.
There's also a used-market angle worth naming: previous-generation GPUs sold secondhand are often the single best value in the whole hobby, especially right after a new generation launches. The risks are real — no warranty, possible heavy prior use — but a card that boots, holds clocks under a fifteen-minute stress test, and shows no artifacts is very likely fine. Buy locally where you can test before paying.
Pitfalls that cost first-time builders the most
Skipping the standoffs, or using too many. The brass standoffs raise the motherboard off the case tray. Miss one and the board flexes when you seat the GPU; add one where the board has no hole and you short a trace. Match standoff positions to your board's form factor exactly.
Overtightening screws. Snug, then stop. Motherboard screws, cooler mounting hardware, and M.2 retention screws all strip or crack things when forced. The M.2 screw in particular is tiny and easy to overtorque.
Thermal paste anxiety. A pea-sized dot in the center works fine for nearly every CPU. Most coolers ship with paste pre-applied — if yours does, don't add more. Never reuse cured paste after removing a cooler; clean both surfaces with isopropyl alcohol and reapply.

Forgetting to remove the plastic film on the cooler's cold plate. It looks like part of the cooler. Leaving it on causes immediate thermal shutdown and a genuinely confusing first hour.
Wrong PSU cables. Never mix modular cables between power supplies, even from the same manufacturer — pinouts differ between models and the result can destroy components. Use only the cables that came in the box with your specific unit.
Not enabling the RAM profile. Covered above, but it bears repeating because it's the highest-value single click in the whole process. Enter BIOS, enable XMP or EXPO, save, reboot, verify the speed in Task Manager.
Buying the monitor last. Decide the display target first. Everything downstream depends on it, and a mismatched panel wastes the money you spent on the GPU.

Ignoring the noise. Fan curves ship aggressive by default on many boards. Ten minutes in BIOS or in the manufacturer's fan-control utility, setting a gentle ramp that stays quiet until 60 °C, is the difference between a machine you enjoy sitting next to and one you resent.
Neglecting the peripherals and the room. Cable management inside the case matters less than most first-timers think; airflow and dust filters matter more. Set the tower where it can breathe, clean the filters every couple of months, and it'll run quietly for years.
Assuming more expensive means faster. RGB, exotic case materials, and premium motherboards contribute essentially nothing to frame rate. Every dollar moved from cosmetics to the GPU buys measurable performance.
Related questions
Do I need to buy Windows, or can I use it free?
Windows will run unactivated indefinitely with minor cosmetic restrictions — a watermark and locked personalization settings. Game performance is unaffected. Buying a legitimate license removes the limits; OEM and retail keys are both valid options.
How long should a gaming PC last before it needs upgrading?
Expect four to six years of comfortable play at your original settings target, with a mid-life GPU swap extending it further. CPU and motherboard platforms typically age out first as socket support ends and new games lean harder on core count.
Is it safe to build without an antistatic wrist strap?
Practically, yes — static damage is rare on modern components. Work on a hard non-carpeted surface, touch the bare metal case frame periodically to equalize, keep parts in their antistatic bags until use, and don't build in socks on carpet in winter.
Should I overclock my first build?
No. Modern CPUs and GPUs already boost aggressively on their own, and manual overclocking now yields single-digit percentage gains for meaningful heat, noise, and stability risk. Enabling XMP/EXPO for memory is the only "overclock" worth doing.
What order should I install things in after Windows?
Chipset drivers first, then GPU drivers, then Windows Update, then your game launchers. Installing GPU drivers before chipset drivers occasionally causes odd behavior on AMD platforms. Reboot between the first two.
FAQ
How much should a first gaming PC cost?
For a first build, $1,100–$1,500 covers a machine that plays current titles at 1440p high settings above 90 fps and stays relevant for several years. You can build a genuinely capable 1080p machine for $700–$900. Below about $600, a used prebuilt or a console usually delivers more playable performance per dollar than new parts.
What's the single most important component?
The graphics card, by a wide margin — it typically consumes 35–50% of a gaming budget and determines resolution and frame-rate ceiling more than anything else. The correct sequence is to pick the GPU that matches your monitor target, then size the CPU, power supply, and cooling around it rather than the reverse.
Do I need liquid cooling?
Almost certainly not. A quality tower air cooler in the $35–$50 range handles every mainstream CPU at full boost, has no pump to fail, and often runs quieter than an entry-level all-in-one. Liquid cooling makes sense for the highest-power chips, for small cases where a tall cooler won't fit, or purely for looks.
How much RAM do I actually need in 2027?
32 GB is the practical baseline for a new build. 16 GB still runs everything but has started hitching in demanding open-world titles and in any scenario where you're streaming, running a browser with many tabs, or keeping a game open alongside other applications. Buy a matched two-stick kit rather than four sticks, and enable the XMP/EXPO profile.
What do I do if it doesn't turn on?
Work the checklist in order: confirm the PSU switch is on and the wall outlet is live, verify both the 24-pin motherboard connector and the 8-pin CPU connector are fully seated, reseat the RAM until both clips click, reseat the GPU, and check the front-panel power switch header against the motherboard manual. Then strip to bare minimum on a bench — board, CPU, cooler, one RAM stick, PSU — and jump the power pins directly. Motherboard debug LEDs or POST codes will point at the failing subsystem.
Can I reuse parts from an old computer?
The case, storage drives, and sometimes the power supply carry over cleanly if the PSU is under about five years old, is from a reputable brand, and has the connectors your new GPU needs. RAM and CPU coolers usually don't transfer across a platform generation. Old mechanical hard drives are fine as bulk game storage but shouldn't be the boot drive.
Sources
- https://www.tomshardware.com/best-picks/best-gpus
- https://www.anandtech.com/
- https://www.gamersnexus.net/
- https://www.techpowerup.com/gpu-specs/
- https://pcpartpicker.com/
- https://www.rtings.com/monitor
- https://learn.microsoft.com/en-us/windows/
- https://www.pugetsystems.com/labs/articles/
- https://www.ifixit.com/
Related on PULSE
- How do I pick a monitor that matches my graphics card?
- What's the difference between a CPU bottleneck and a GPU bottleneck?
- How do I diagnose a PC that won't post?
- Is a gaming laptop worth it compared to a desktop?
- How much VRAM do I actually need for 1440p gaming?
- When is a GPU-only upgrade better than a whole new build?
This page will be disappearing soon. Save it to your device for $1 — or read it free while it is here.
@Kory-White- · if Venmo asks, the last 4 of my number are 2012
 pulse-recentTop 10 Most Expensive Retro Game Cartridges to Buy in 2027
 pulse-recentTop 10 Most Expensive Collector's Edition Gaming Consoles in 2027
 pulse-gamingWhat should you know before investing in Gaming in 2027?
 pulse-gamingTop 10 Gaming TVs — Best Overall + Best Value in 2027
 pulse-recentWhat is the difference between a Hall effect and a mechanical switch controller in 2027?
 pulse-recentHow much does a PlayStation 5 Pro cost in 2027?
 pulse-gamingThe 10 Best Retro Video Games to Collect in 2027
 pulse-recentTop 10 Best-Selling Sega Genesis Games of All Time in 2027
 pulse-recentTop 10 Most Expensive Sealed Game Boy Advance Games to Buy in 2027
 pulse-gamingTop 10 Gaming strategies for 2027