
How do you plumb an aquarium sump?
 Curated byKory White · Fractional CRO · Maryland
 PULSEKNOWLEDGE LIBRARY
Quality
Certified
Plumbing an aquarium sump means connecting a display tank to a lower reservoir using a drain line (gravity-fed from an overflow box or drilled hole) and a return line (pumped back up). Size the drain to handle full pump flow, install a gate valve to fine-tune the drain, add an anti-siphon hole (and ideally a check valve) on the return to prevent back-siphoning, and trap microbubbles with baffles. For a 75-gallon tank, use 1-inch PVC for the drain and 3/4-inch for the return, with a 600–800 GPH pump such as the Sicce Syncra Silent 3.0 sized to your head height. Always test the whole system with fresh water before adding livestock.
#
Why Sump Plumbing Has to Be Done Right
A poorly plumbed sump causes microbubbles, noise, and — worst of all — flood risk. The two failure modes you are designing against are (1) the drain not keeping up with the pump, which overflows the display, and (2) back-siphoning through the return on power loss, which overflows the sump. Good plumbing is modular so you can service and upgrade it without rebuilding the system.
Core Components of a Sump System
Overflow Box and Drain Line
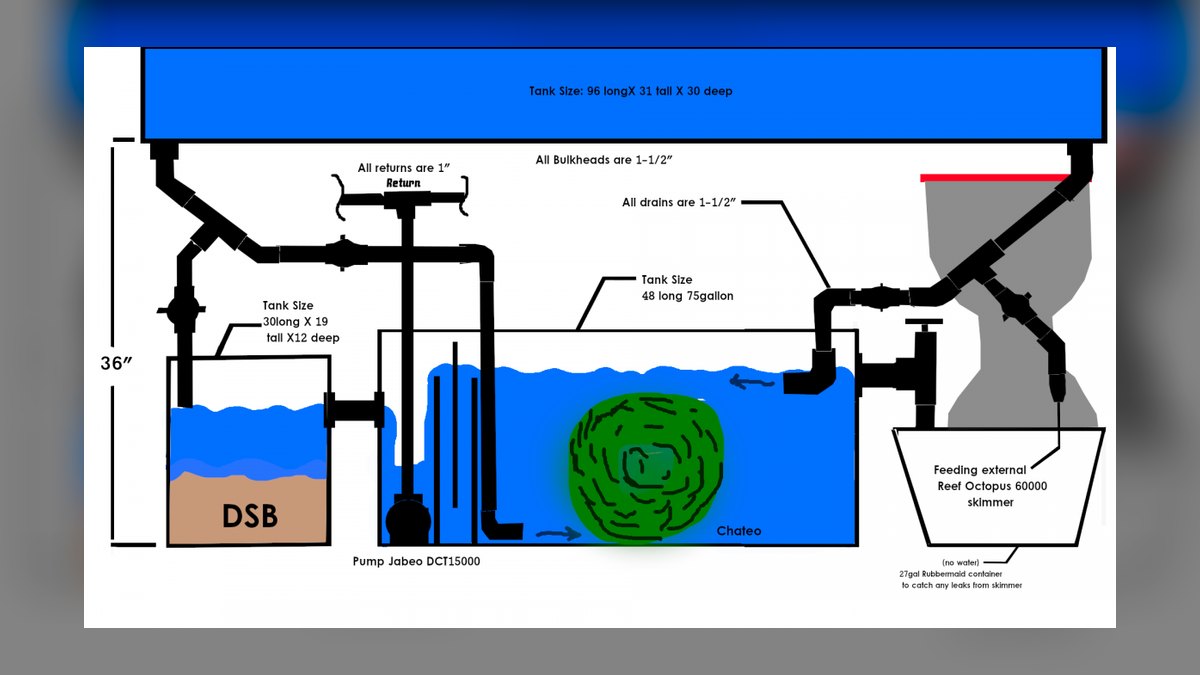
The drain line carries water from the display to the sump. For a 90-gallon tank, drill the back glass for a 1.5-inch bulkhead, or use a hang-on overflow box such as the Eshopps Eclipse if you can't drill. Run Schedule 40 PVC. Throttle flow with a valve on the drain, but never close it fully or the overflow can lose its siphon.
Return Pump and Line
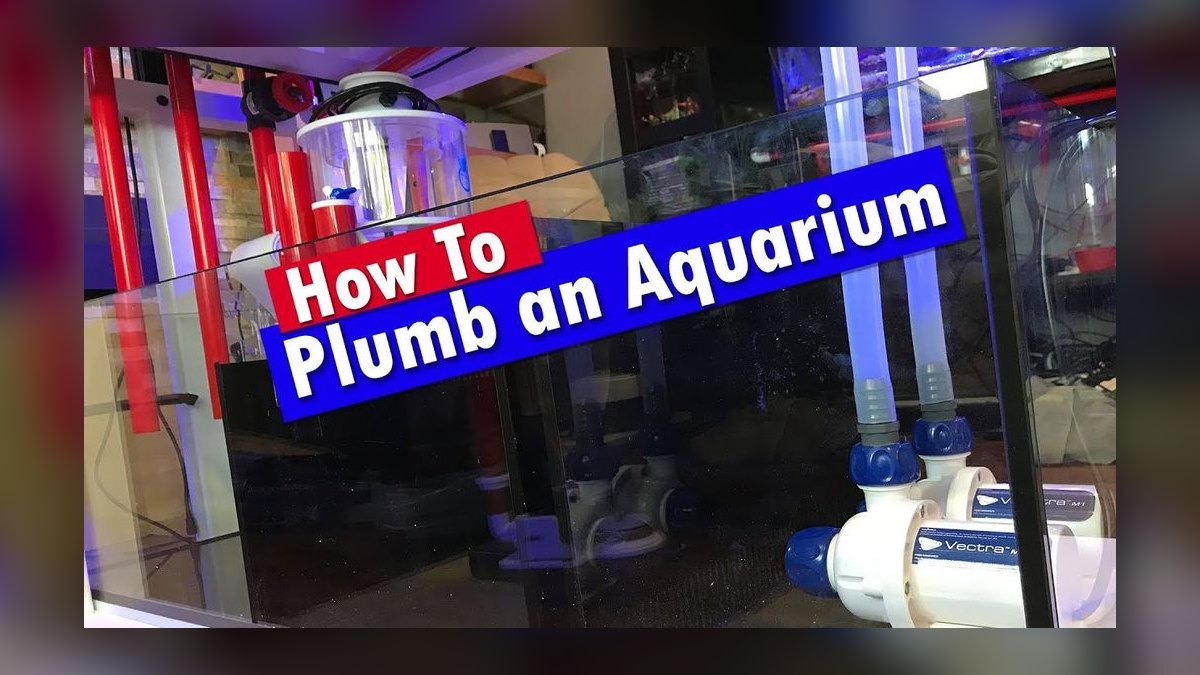
The return line pushes water back up. Choose a pump rated for your target turnover at your actual head height, not the box rating. For a 4-foot vertical lift, a variable-speed DC pump like the Jebao DCP-5000 or Sicce Syncra delivers usable flow with room to dial it down. Use flexible PVC (e.g., Spaflex) to absorb vibration, and add a check valve (e.g., a Spears 3/4-inch PVC check valve) above the pump as backup against back-siphon.
Sump Design and Baffles
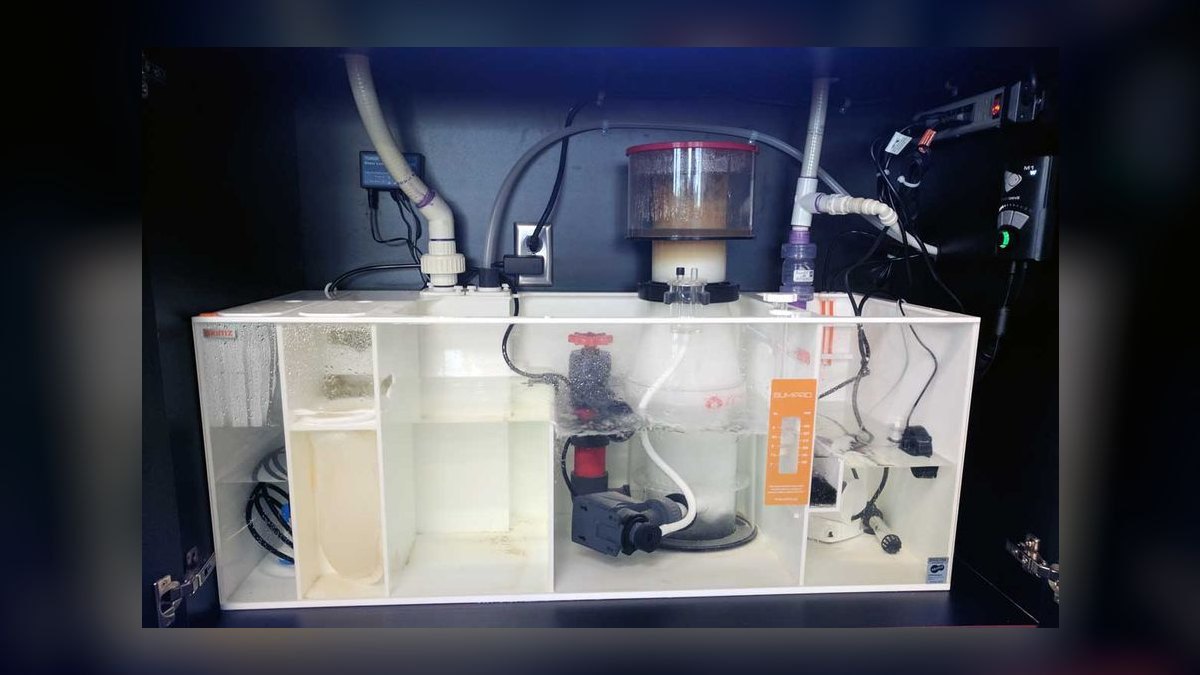
A typical sump has three zones: a skimmer/intake chamber, a refugium (optional), and a return chamber. Use baffles of 1/4-inch acrylic spaced about 1 inch apart to trap bubbles before water reaches the return pump. Pre-built sumps like the Trigger Systems Crystal Sump or an Eshopps model come with slots cut for baffles.
Step-by-Step Plumbing Process
Step 1: Measure and Cut Pipe
Measure from the overflow bulkhead to the sump intake. Cut 1-inch PVC with a PVC cutter or hacksaw, deburr the edges, and dry-fit every joint before gluing.
Step 2: Install the Drain Line
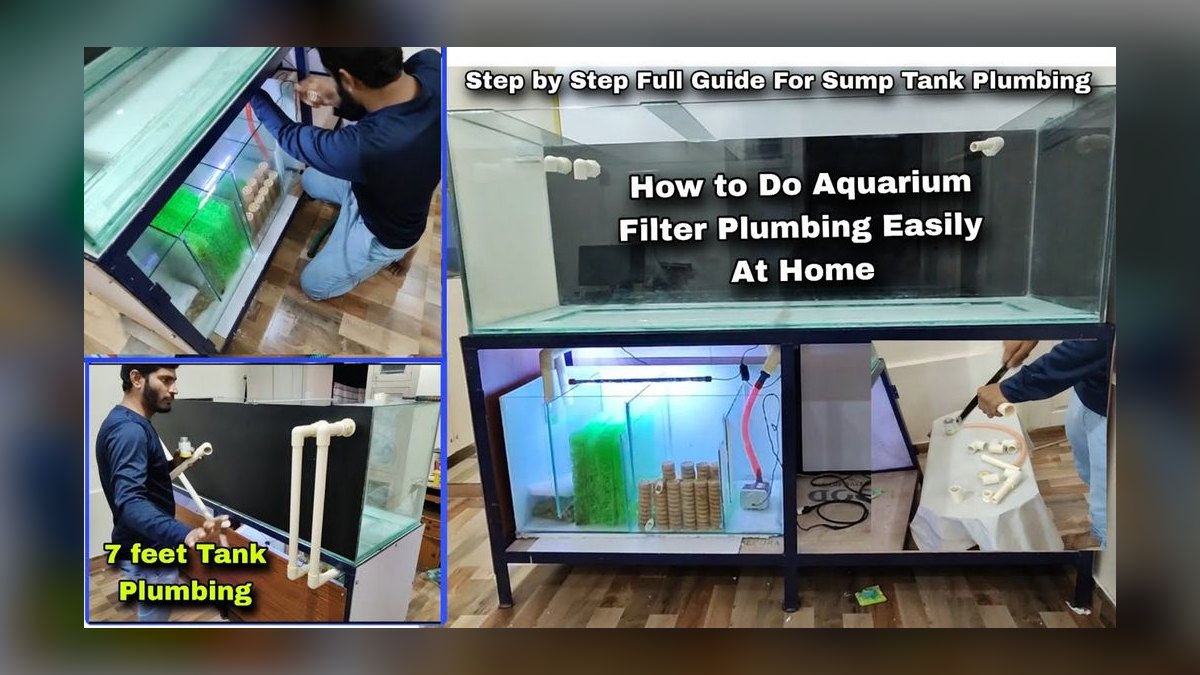
Glue the drain pipe to the bulkhead with PVC cement (e.g., Oatey). Add a 45-degree elbow to direct flow gently into the sump's first chamber. Install a gate valve (e.g., a Spears 1-inch gate valve) near the sump so you can fine-tune the drain to a controlled, quiet siphon.
Step 3: Set Up the Return Line
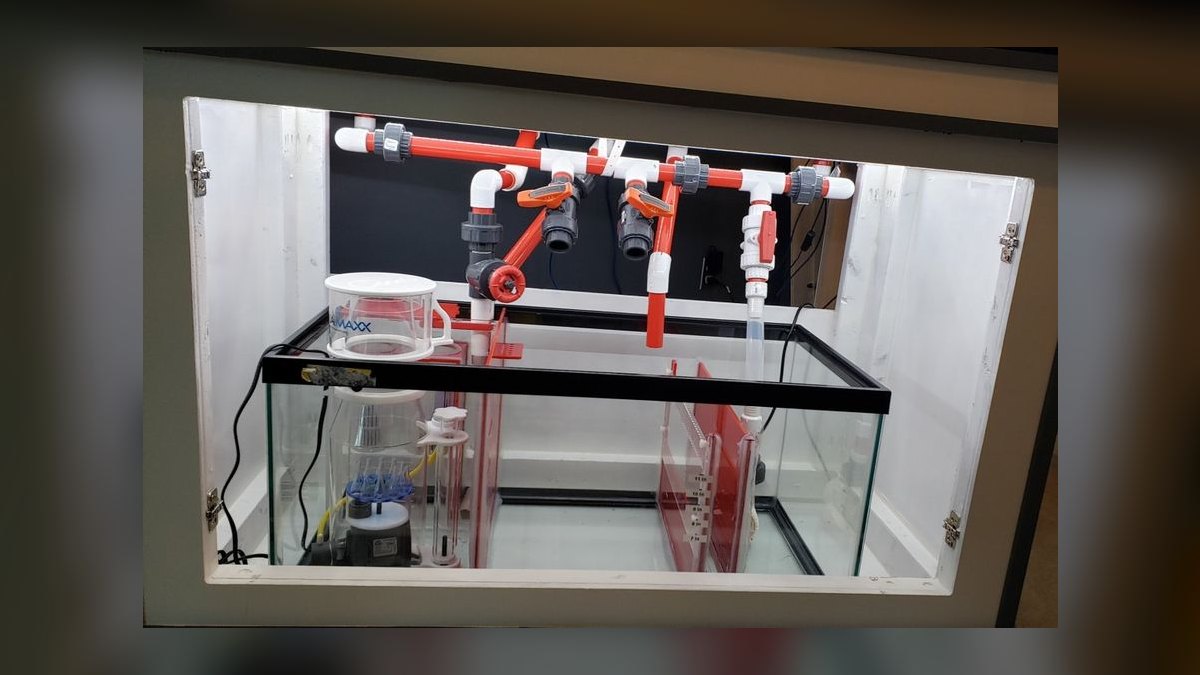
Connect the pump outlet to 3/4-inch PVC, run it up the back of the tank, and use 90-degree elbows to reach the display. Add a union near the pump so you can remove it for cleaning without cutting pipe.
Step 4: Test for Leaks
Fill the system with fresh water and run the pump for several hours. Check every joint with a paper towel. Adjust the gate valve to match drain flow to pump output — if the sump level drops, open the valve; if it rises, close it slightly.
Step 5: Add Safety Features
Install an auto top-off (ATO) float or optical sensor in the return chamber, tied to an RO/DI reservoir, to replace evaporation. Place a leak/spill mat or tray under the sump.
Critical Detail: Prevent the Power-Loss Flood
Drill a small anti-siphon hole (about 1/8 inch) in the return pipe just below the display water line. On a power outage this breaks the siphon so the display only drains down to the hole, not all the way to the sump. Combined with a properly sized sump that has room for the drained-down volume, this is what prevents an overflow when the pump stops.
Water Circulation Loop
Common Mistakes and How to Avoid Them
Oversized Pump
A 2000 GPH pump on a 75-gallon tank can overwhelm a 1-inch drain and flood the display. Match pump output to drain capacity (a 1-inch drain comfortably handles roughly 600–900 GPH), and use a variable-speed DC pump so you can dial flow down.
No Anti-Siphon Hole
Without the small anti-siphon hole below the water line, a power outage siphons display water back to the sump until it overflows. Drill the hole cleanly so it can't clog with snails or detritus, and check it during maintenance.

Rigid PVC Everywhere
Hard PVC transmits pump vibration into the stand as noise. Use flexible PVC on the return line to dampen sound and absorb minor misalignment.
Sizing Your Plumbing for Different Tank Volumes
Choosing the right pipe diameters and pump flow is critical for a balanced system. For smaller tanks (20–40 gallons), use 3/4-inch drain and 1/2-inch return with a pump rated 200–400 GPH at 3–4 feet of head (e.g., Sicce Syncra Silent 1.0 or Eheim Compact 1000). For medium tanks (55–90 gallons), a 1-inch drain and 3/4-inch return with a 600–900 GPH pump (like the Jebao DCP-3000 or Sicce Syncra Silent 3.0) works well. For large tanks (120–200+ gallons), step up to 1.5-inch drain and 1-inch return with a pump rated 1200–2000 GPH at head height (e.g., Reef Octopus Varios-6 or Jebao DCP-8000).

A common rule of thumb: the drain should be one pipe size larger than the return to prevent restriction. For example, a 1-inch return pairs with a 1.5-inch drain. This ensures the gravity drain can handle full pump flow without gurgling or flooding. Always oversize the drain slightly—if your pump pushes 800 GPH, a 1.5-inch drain (rated ~1000–1200 GPH at minimal head) gives a safety margin. Test with a bucket and stopwatch: fill a 5-gallon bucket from the return line, time it, and verify the drain matches or exceeds that rate.
Managing Noise and Microbubbles with Baffle Design
Noise and microbubbles are the top complaints in sump setups. Baffles—vertical glass or acrylic panels in the sump—break water flow and trap bubbles. A standard three-chamber design works: intake chamber (where drain water enters), refugium/heater chamber (middle), and return chamber (pump). Use two baffles: the first is a downflow baffle (water goes over the top), the second is an upflow baffle (water goes under it). This forces water to travel up and down, stripping bubbles. Space baffles 1–2 inches apart; for a 20-gallon sump, use 1-inch gaps.

For quieter operation, add a filter sock on the drain line inside the intake chamber—this catches debris and silences splashing. Use a 100–200 micron felt sock (e.g., BRS 4-inch filter socks). Alternatively, install a bubble trap: a tall vertical baffle with a small gap at the bottom (1/2 inch) followed by a second baffle with a gap at the top. This creates a labyrinth that kills microbubbles. For a 40-gallon breeder sump, use 1/4-inch acrylic or 1/8-inch glass for baffles, silicone-sealed in place. Test with fresh water: if bubbles persist, add a third baffle or increase the gap sizes slightly.
Safety Features: Anti-Siphon Holes, Check Valves, and Emergency Drains
Preventing floods is non-negotiable. The return line must have an anti-siphon hole drilled near the water surface in the display tank—typically 1/8-inch to 1/4-inch diameter. When the pump stops, this hole breaks the siphon, stopping backflow. Place it just below the waterline (1/2 inch down) so it doesn't suck air during normal operation. For a 1-inch return pipe, drill a 3/16-inch hole; test by simulating a power outage—water should only drain a few inches into the sump.
A check valve on the return line adds redundancy, but they can fail from salt creep or debris. Install a swing check valve (e.g., Spears or Lasco) in a vertical section of PVC, not horizontal, to ensure it closes fully. Even with a check valve, always keep the anti-siphon hole—it's your primary defense. For extra safety, add a secondary drain or emergency overflow in the sump. This is a second bulkhead at the top of the sump's return chamber, plumbed to a drain or bucket. Set it 1–2 inches below the sump rim; if the return pump fails or the main drain clogs, water spills here instead of onto the floor. For a 75-gallon system, use a 1-inch emergency drain with a standpipe (e.g., Durso or Herbie style) to handle 300–500 GPH silently.
Choosing the Right Pipe Material and Fittings
PVC is the standard for saltwater and freshwater sump plumbing due to its durability, affordability, and resistance to corrosion. Use schedule 40 PVC for most applications—it's strong enough for typical aquarium pressures without being overly rigid. For tight spaces or where you need flexibility, spa flex PVC (flexible PVC) is a good alternative that still glues with standard PVC cement. Avoid using standard vinyl tubing for drain lines, as it can kink and restrict flow. For fittings, use slip-slip connections wherever possible for a cleaner, leak-free bond, and include union ball valves on both the drain and return lines so you can isolate and service components without draining the entire system.

Managing Noise and Flow Control
A silent sump requires careful tuning. Install a gate valve (not a ball valve) on the drain line for precise flow adjustment—gate valves allow fine control to match the pump's output and prevent the "flushing" sound of an air-starved drain. For additional noise reduction, consider a Herbie-style overflow (two drains: one main siphon, one emergency) or a BeanAnimal-style setup (three drains) which virtually eliminates trickling water sounds. On the return line, position the pump intake at least an inch off the sump bottom to avoid sucking in debris, and use a strainer or pre-filter sponge to protect the impeller. Always leave a small air gap at the return's anti-siphon hole to ensure it breaks the siphon reliably on power loss.
Testing and Adjusting Before Final Setup
Never assume your plumbing will work perfectly on the first try. Fill the system with fresh water and run it for at least 24 hours, checking for leaks at every joint and fitting. During this test, adjust the gate valve on the drain to find the sweet spot where water flows silently without gurgling. Also verify that the sump's water level stays stable during pump operation and that the return's anti-siphon hole actually breaks the siphon when the pump is unplugged. Mark the ideal water level on the sump with a piece of tape so you can quickly return to it after maintenance. Only when the system runs flawlessly for a full day should you add salt or livestock.
FAQ
What size PVC should I use for a 55-gallon sump? Use 1-inch PVC for the drain and 3/4-inch for the return. Pair it with a modest pump (around 500–600 GPH at 4 feet of head), such as a Sicce Syncra Silent 2.0.
How do I prevent microbubbles in the display tank? Use a series of bubble-trap baffles in the sump (typically three, spaced about an inch apart) and a filter sock on the drain intake to slow and de-gas the water before it reaches the return pump.
Can I use flexible hose instead of PVC? Yes, mainly for the return line. Flexible PVC (Spaflex) resists kinking under pressure; soft vinyl tubing is fine for small low-flow tanks but can collapse on larger returns.
How often should I clean sump plumbing? Flush the drain line periodically with a pipe brush to clear algae and biofilm, and soak the return pump impeller in a vinegar/water solution every few months to remove coralline and scale.
What happens if the return pump fails? Flow to the display stops; the display drains to the overflow weir (and to the anti-siphon hole), and the return chamber level drops. Size the sump so it can hold that drained-down water without overflowing, and consider a battery backup or backup pump on a UPS.
Do I need a check valve on the return line? A check valve is useful as backup, but it should never be your only protection — they can stick open with debris. The anti-siphon hole is the primary, fail-safe back-siphon defense.
Related on PULSE
- [Top 10 aquarium dosing pumps for reef tanks in 2027](/knowledge/aq1148)
- [Top 10 fast-growing stem plants to outcompete algae in a new tank.](/knowledge/aq1145)
- [How do you safely introduce wild-caught fish into a home aquarium?](/knowledge/aq1144)
- [What is the best way to control cyanobacteria without using chemicals?](/knowledge/aq1143)
- [How do you prevent green hair algae in a planted tank?](/knowledge/aq1142)
Sources
- Bulk Reef Supply: How to plumb a sump
- Sicce Syncra pump specifications
- Eshopps overflow boxes and sumps
- Spears PVC check and gate valves
- Reef2Reef: Herbie and Bean Animal overflow guides
- Marine Depot / BRS sump and overflow articles
Bottom Line
Plumbing an aquarium sump correctly comes down to right-sized pipe, valve control on the drain, and back-siphon protection via an anti-siphon hole and a sump with enough buffer volume. Trap microbubbles with baffles, dampen noise with flexible PVC, and always test the full loop with fresh water before any livestock goes in. Get the physics right and the sump runs quiet, stable, and flood-free for years.
*Plumbing an aquarium sump correctly prevents floods and keeps water quality stable for healthy fish and coral in 2027.*
This page will be disappearing soon. Save it to your device for $1 — or read it free while it is here.
@Kory-White- · if Venmo asks, the last 4 of my number are 2012
This page is gone.
This one is off the shelf now. $1 keeps it on your phone for good — the whole page, pictures and diagrams included.
 pulse-aquariumsTop 10 Catfish Species for Community Aquariums in 2027
 pulse-aquariumsIs Aquariums worth it in 2027?
 pulse-aquariumsHow do you acclimate new fish to an aquarium?
 pulse-aquariumsTop 10 Pleco Species for Freshwater Aquariums in 2027
 pulse-aquariumsHow do you maintain stable salinity in a reef tank?
 pulse-aquariumsTop 10 Anemone Species for Clownfish Tanks in 2027
 pulse-aquariumsTop 10 Planted Tank Substrates in 2027
 pulse-aquariumsHow do you tell male and female aquarium fish apart?
 pulse-aquariumsTop 10 Aquarium Background Plants for Aquascaping in 2027
 pulse-aquariumsBest auto feeder for vacation in 2027