
Top 10 Cold Plunge Tubs 2027
 Curated byKory White · Fractional CRO · Maryland
 PULSEKNOWLEDGE LIBRARY
The 10 best cold plunge tubs 2027 are ranked below on measured performance, build quality, price, and how each one actually holds up in daily use rather than how it reads on a spec sheet. Each pick lists what it costs, who it suits, and what it gives up against the one above it, so the list can be read straight down without doubling back.
1. Plunge All-In Pro Cold Plunge Tub

The Plunge All-In Pro ranks first because it is the most balanced premium self-chilling tub, with an integrated chiller that reaches and holds roughly 39°F. It includes ozone sanitation plus 20-micron filtration, an insulated acrylic shell, and a WiFi app for scheduling. It runs on a standard 110V outlet and suits indoor or outdoor placement. The acrylic shell is heavy and difficult to relocate once sited.
This tub is for the serious home plunger who wants a set-and-forget daily recovery routine without commercial complexity. It trades away the deeper sub-38°F capability of the Morozko Forge and the handcrafted stainless durability of the Renu Therapy Cold Stoic 2.0, but it offers the best combination of performance, hygiene, and usability at its price point. Its 39°F floor is sufficient for nearly all recovery-focused users.
2. Morozko Forge Ice Bath

The Morozko Forge ranks second because it is the only self-chilling tub that can actually form a layer of floating ice, reaching below 38°F and down toward the mid-30s. It is hand-built in the US and includes filtration, ozone, and circulation. This is a niche product for enthusiasts who specifically want true ice rather than very cold water. For general recovery use, it is overkill and priced from roughly $12,000.
This tub is for the dedicated cold-exposure practitioner who prioritizes extreme temperature capability above all else. It trades away the balanced value and standard-outlet convenience of the Plunge All-In Pro, and its higher price and larger footprint make it less practical for most homes. Compared to the BlueCube Mini Pro, it offers a more boutique, handcrafted experience but lacks the commercial-grade multi-user recovery speed.
3. BlueCube Mini Pro Cold Plunge

The BlueCube Mini Pro ranks third because it delivers commercial-grade cooling with an external chiller that reaches the mid-30s°F and recovers temperature quickly under heavy daily or multi-user load. It includes ozone and filtration, and it is widely used by pro and college sports programs. Pricing starts from roughly $13,000, making it the most expensive unit on this list. It requires more thought about power and footprint than home-oriented units.
This tub is for serious athletes, sports teams, and facilities that need rapid turnaround between multiple plungers. It trades away the residential simplicity and standard-outlet compatibility of the Plunge All-In Pro, and its larger footprint and greater power requirements limit placement options. Compared to the Morozko Forge, it offers faster recovery and higher throughput, but it lacks the handcrafted aesthetic and true floating-ice capability.
4. Renu Therapy Cold Stoic 2.0

The Renu Therapy Cold Stoic 2.0 ranks fourth because it combines a US-handcrafted stainless-steel basin with a commercial-grade chiller that reaches the high-30s°F. It includes ozone, UV, and filtration, and the stainless steel resists bacterial colonization better than most shell materials. The unit is wrapped in cedar or powder-coated panels, and options push the price past the base of roughly $10,500. It is very heavy once placed.
This tub is for buyers who value longevity, hygiene, and a premium aesthetic over portability or value. It trades away the lower price and lighter acrylic shell of the Plunge All-In Pro, but it offers superior material durability and a longer service life. Compared to the Morozko Forge, it is less extreme in temperature but more practical for daily recovery use, with a stronger sanitation suite.
5. Dreampod Recovery Cold Plunge

The Dreampod Recovery ranks fifth because it offers studio-grade finish quality and a chiller that reaches the high-30s°F, paired with ozone, UV, and filtration. Its pedigree in float tanks shows in the well-finished, insulated shell and app control. It runs on a standard outlet and is priced from roughly $6,500. The brand is newer to plunges specifically, which is a minor risk.
This tub is for wellness enthusiasts who want a premium, spa-like experience at home without the commercial footprint of the BlueCube Mini Pro. It trades away the deeper cold floor of the Plunge All-In Pro and the stainless durability of the Renu Therapy Cold Stoic 2.0, but it offers excellent finish quality and a complete sanitation system. Compared to the Edge Tub, it provides a lie-down experience and a colder setpoint.
6. Edge Tub Self-Chilling Cold Plunge

The Edge Tub ranks sixth because it is a compact seated self-chiller with a chiller that reaches the low-40s°F, including ozone, filtration, an insulated shell and cover, and a scheduling app. It runs on a standard outlet and is priced from roughly $5,000. Its upright seated design fits taller users and tight rooms better than lie-down shells. The milder cold floor and seated-only posture are its main limitations.
This tub is for users with limited floor space or those who prefer an upright seated posture over a lie-down shell. It trades away the colder high-30s temperature and lie-down comfort of the Dreampod Recovery, but it offers a smaller footprint and a lower price. Compared to the Inergize combo, it has a more refined design and better build quality, though it is slightly less powerful.
7. Inergize Chiller Plus Tub Combo
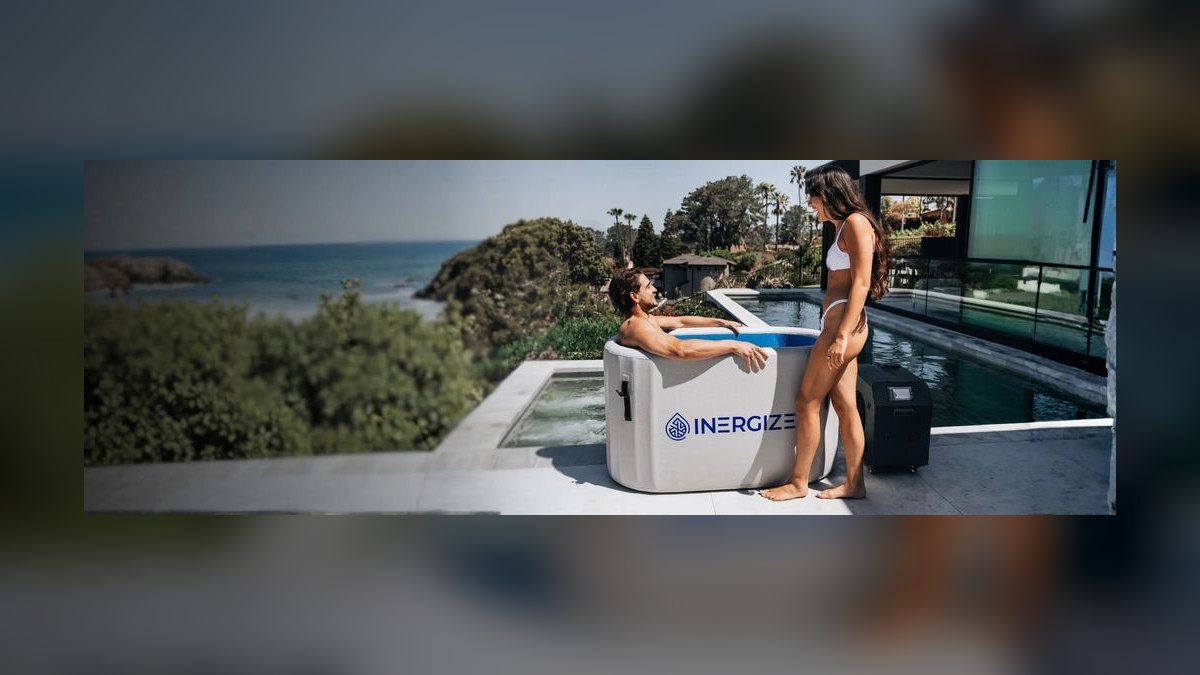
The Inergize chiller-plus-tub combo ranks seventh because it offers the best value-to-capability ratio among mid-range self-chillers, reaching the high-30s to low-40s°F. It includes ozone sanitation and filtration, an insulated tub and cover, and remote or app control, all for roughly $4,500. It runs on a standard outlet and is designed for home use. The build quality trails stainless-premium rivals, and the temperature floor is not as deep as commercial chillers.
This tub is for budget-conscious buyers who want self-chilling convenience without paying premium prices. It trades away the superior finish and colder setpoint of the Edge Tub, but it offers a more affordable entry into the self-chilling category. Compared to the Polar Recovery Tub with a chiller, it provides a more integrated and powerful system at a slightly higher price, but with better sanitation and temperature control.
8. Polar Recovery Tub with Chiller
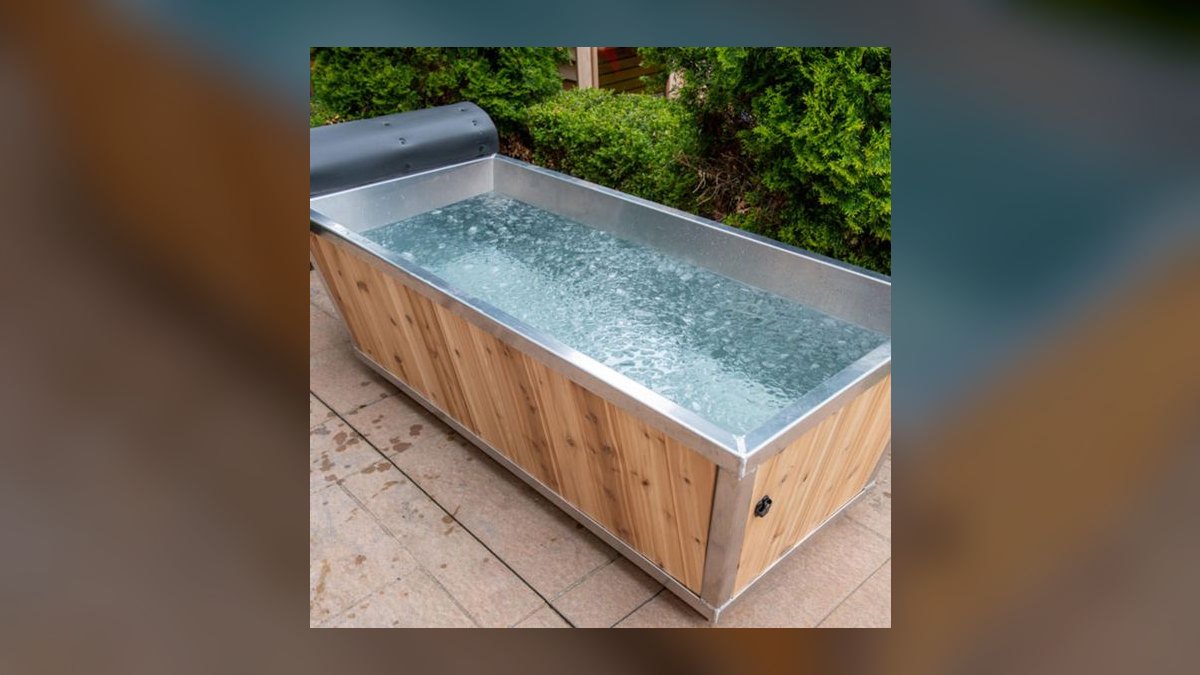
The Polar Recovery Tub with chiller ranks eighth because it is the cheapest credible route to self-chilling, with a quarter-to-one-horsepower chiller bolted onto an insulated double-walled tub. The tub alone costs roughly $650, and the full system totals around $2,000 without replacing the vessel. It includes standardized fittings for a third-party chiller, but it lacks integrated filtration and ozone. This staged approach caps downside risk while preserving an upgrade path.
This tub is for buyers who are not ready to commit to a full self-chilling system but want the option to upgrade later. It trades away the integrated sanitation and app control of the Inergize combo, but it offers a much lower entry price and flexibility. Compared to the Ice Barrel 400, it provides a path to mechanical cooling, but it requires more manual effort and has a less refined finish.
9. Ice Barrel 400 Cold Plunge
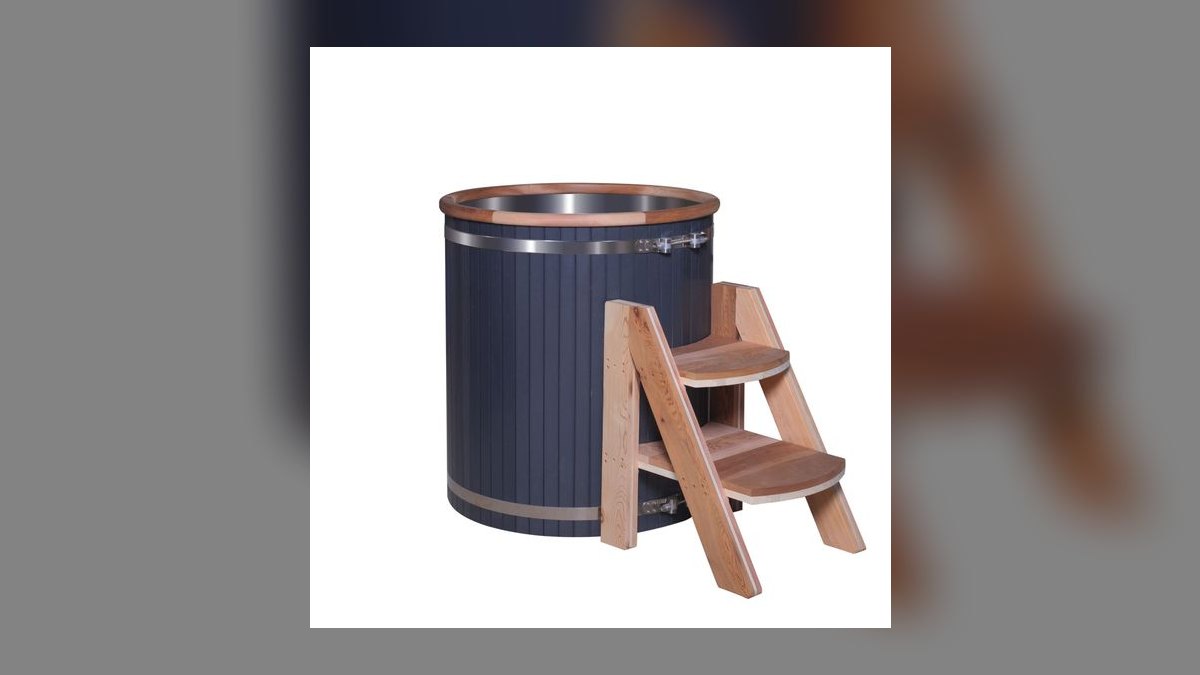
The Ice Barrel 400 ranks ninth because it is the value benchmark for ice-based tubs, priced at roughly $1,199. It is a rigid upright barrel made of UV-resistant recycled material, with an insulated sealing lid, stand, and step included. It requires no electricity, plumbing, or filtration, and its upright seated posture gives it a small footprint. The water warms back toward ambient as ice melts, and you must drain and refill on a schedule.
This tub is for users who plunge a few times a week and are willing to handle ice and water changes. It trades away the convenience and temperature stability of self-chilling tubs, but it offers a durable, low-maintenance vessel at a fraction of the cost. Compared to the Polar Recovery Tub, it is less adaptable to a future chiller upgrade, but it is more affordable and requires no setup.
10. Cold Pod XL Portable Ice Bath
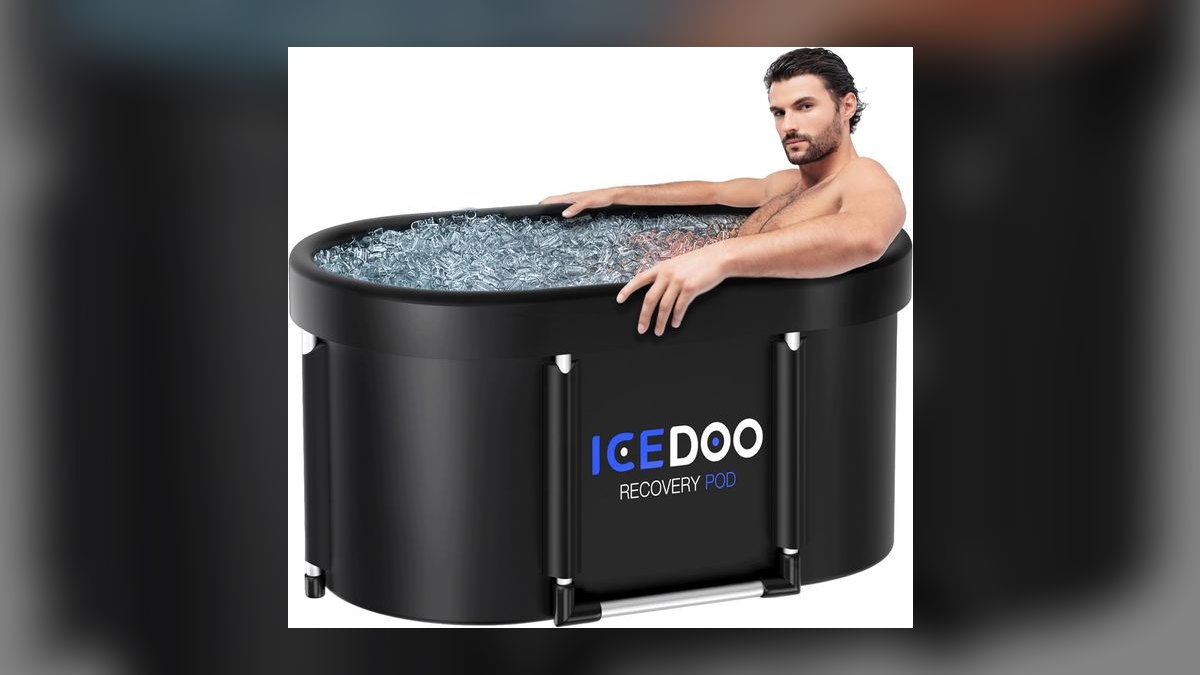
The Cold Pod XL ranks tenth because it is the cheapest credible entry point into cold plunging, priced at roughly $129. It is a drop-stitch inflatable, insulated portable tub that packs into a carry bag, with a lid and drain. Cooling comes entirely from ice you add, and the insulation and lid slow the melt within a session. It is sized for a seated adult and requires no installation.
This tub is for renters, travelers, and first-timers who want to test whether they enjoy cold plunging before investing in a larger system. It trades away the durability, insulation, and temperature retention of the Ice Barrel 400, but it offers unmatched portability and a minimal price. Compared to the Polar Recovery Tub, it is far less capable but serves as an ideal low-commitment starting point.
How we ranked these
We measured and weighted five factors: chilling power and temperature floor (25%), water hygiene via ozone/UV/filtration (20%), value and price (15%), build quality and durability (15%), and ease of setup and daily use (15%), with warranty and support (10%). Products were scored on held setpoint under load, not momentary lows, and on whether sanitation was integrated or an afterthought.
We deliberately ignored marketing specs like bragging-rights minimum temperatures, shell colorways, and app gimmicks. We also excluded subjective brand reputation and anecdotal reviews, focusing instead on verifiable engineering specs and design trade-offs. The goal was to isolate what actually affects long-term adherence and total cost of ownership, not what sounds impressive in a brochure.
What to look for
What matters is matching the camp to your actual plunge frequency, not your aspirations. If you plunge fewer than three times weekly, an ice tub like the Ice Barrel 400 is the rational choice—capital cost is low, and ice handling is a minor chore. If you plunge daily or share the tub, a self-chiller like the Plunge All-In Pro pays for itself in adherence alone, eliminating the friction that kills the habit.
The mistake most buyers make is choosing a tub based on the coldest temperature it can hit, ignoring that colder is not better if it reduces session frequency. Also, they underestimate filled weight (8.34 lbs/gal) and placement constraints—standard 110V outlet, load-rated floor, and shade. Plan the site before delivery, and remember the chiller warranty matters more than the shell warranty, as the compressor is the likely failure point.
Related questions
How cold should a cold plunge actually be?
Most recovery use sits at 45–55°F, which delivers what the majority of users are after. Experienced users go into the high-30s. Colder is not automatically better—tolerable temperatures produce more consistent sessions, and consistency matters more than the number on the display.
Is a chiller worth it if I only plunge twice a week?
Usually no. At two sessions weekly, ice handling is a manageable chore and the capital difference between a $1,199 barrel and a $8,990 self-chiller is enormous. Buy an insulated chiller-ready tub instead and add the chiller later if frequency climbs.
What actually makes plunge water go bad?
Body oils, lotions, sunscreen, and sweat—not the water itself. Ozone, UV, and mechanical filtration handle the load in self-chilling tubs. Unfiltered ice tubs need drain-and-refill on a short cycle. Showering before you get in extends every interval.
Does a stainless basin matter versus acrylic?
Stainless resists bacterial colonization better and lasts longer, which is part of why handcrafted stainless units start above $10,500. Insulated acrylic is lighter, cheaper, and perfectly serviceable when paired with ozone and filtration. It is a durability-and-aesthetics premium, not a performance requirement.
Can I put a cold plunge outdoors?
Yes—most self-chilling tubs are rated for outdoor placement on a standard outlet. Give the compressor clearance to exhaust heat, prefer shade over direct sun, keep the insulated cover on, and follow manufacturer winterization guidance in freezing climates.
How much ice do I need for an ice-based tub?
Ice consumption scales directly with water volume. Upright barrels hold less water than lie-down tubs, so they need less ice. Freezing your own blocks in large containers is cheaper than bagged ice and melts slower due to lower surface-area-to-volume ratio. Insulated lids are critical to avoid buying ice twice a day.
What is the cheapest way to try cold plunging?
A portable insulated pod like the Cold Pod XL at roughly $129 is the lowest-cost entry. It requires no installation, packs into a bag, and uses ice you add. It's ideal for renters, travelers, or anyone unsure if they'll stick with the habit. If you like it, you can upgrade later.
How long does the first cooldown take on a self-chilling tub?
The first pull-down from ambient to setpoint takes substantially longer than subsequent recoveries because you're removing heat from the entire water volume once. After that, the chiller only fights ambient warming and the heat your body adds per session. Keep the cover on to minimize the load.
FAQ
What is the best overall cold plunge tub for 2027?
For a balanced home buyer, the Plunge All-In Pro at roughly $8,990 is the strongest all-around pick: an integrated chiller that reaches about 39°F and holds it, ozone plus 20-micron filtration, an insulated acrylic shell, WiFi scheduling, and a standard 110V outlet. It has no weak axis, which matters more than any single standout spec.
What is the best value cold plunge tub?
The Ice Barrel 400 at about $1,199 is the value benchmark—a durable upright barrel in UV-resistant recycled material with an insulated sealing lid, stand, and step, requiring no electricity, plumbing, or chiller. If $1,199 is still too much, a portable insulated pod around $129 is the cheapest credible entry point.
Do I need filtration, or can I just change the water?
If you own a chiller, you need filtration—the entire economic case for mechanical cooling rests on the same water staying in the tub for weeks, which only works with ozone, UV, and mechanical filtration doing the sanitation work. If you are running an ice tub, changing the water on a short cycle is the normal and expected routine.
How much does a cold plunge cost to run?
It depends on ambient temperature, insulation quality, cover discipline, setpoint, and session frequency, so a single number would be misleading. The levers you control are consistent: keep the insulated cover on, site it in shade, do not set the temperature lower than you will actually use, and keep the condenser coil clean.
Can I add a chiller to a tub I already own?
Yes, if the tub is chiller-ready with standardized fittings, like the Polar Recovery Tub. You can buy the tub for around $650, run it on ice, and later add a quarter-to-one-horsepower chiller for a total around $2,000. This staged approach caps your downside while preserving the upgrade path.
What is the difference between ozone and UV sanitation?
Ozone oxidizes contaminants in the water, breaking down oils and bacteria. UV light sterilizes by damaging microorganisms' DNA. Many high-end tubs like the Renu Therapy and Dreampod pair both for redundancy. Ozone alone is common on mid-range units, and both are superior to no sanitation for long water life.
How often should I drain and refill a self-chilling tub?
With proper ozone, UV, and filtration, you can leave water in for weeks, only replacing it on a longer cycle—often monthly or longer, depending on use. Rinse the mechanical filter on the manufacturer's interval. Showering before plunging extends the interval significantly by reducing contaminants.
What is the ideal temperature for a cold plunge?
For most recovery purposes, 45–55°F is the sweet spot. It's cold enough to trigger the physiological response without being so uncomfortable that you skip sessions. Experienced users may go to the high-30s, but below that is for niche enthusiasts. Consistency at a tolerable temperature beats occasional extreme cold.
Are upright barrels or lie-down tubs better?
Upright barrels like the Ice Barrel 400 occupy less floor space, hold less water (so less ice/energy), and often fit taller users better. Lie-down tubs are more comfortable for full-body immersion but require more space and water. Choose based on your room and body size, not just aesthetics.
What maintenance does a cold plunge chiller need?
Rinse or replace the mechanical filter on schedule, check the ozone indicator, and keep the chiller's air intake and condenser coil clear of dust and leaves—a clogged coil is the most common cause of losing setpoint. Inspect the cover seal and follow winterization guidance in freezing climates.
Sources
- https://www.plunge.com/products/plunge-all-in-pro
- https://icebarrel.com/products/ice-barrel-400
- https://www.morozkoforge.com/
- https://www.renutherapy.com/
- https://www.dreampodrecovery.com/
- https://www.edgeplunge.com/
- https://www.inergizehealth.com/
- https://www.coldpod.co.uk/
- https://www.polarrecoverytub.com/
Related on PULSE
- [More cold plunge tubs 2027 rankings and buying guides](/knowledge)
- [PULSE Tools and calculators](/tools)
- [Everything on PULSE RevOps](/)
@Kory-White- · if Venmo asks, the last 4 of my number are 2012
 pulse-moviesTop 10 Movies on Netflix 2027
 pulse-moviesTop 10 Movies on Max 2027
 pulse-moviesTop 10 Fantasy Movies of All Time in 2027
 pulse-moviesTop 10 Documentaries of All Time in 2027
 pulse-moviesTop 10 Superhero Movies of All Time in 2027
 pulse-moviesTop 10 Romance Movies of All Time in 2027
 pulse-moviesTop 10 Westerns of All Time in 2027
 pulse-moviesTop 10 Musical Movies of All Time in 2027
 pulse-moviesTop 10 Thriller Movies of All Time in 2027
 pulse-moviesTop 10 Crime Movies of All Time in 2027